Manage projects in Label Studio Enterprise
Organize projects into workspaces to make order in labeling data with Label Studio Enterprise.
You can manage data and projects in the Label Studio UI using the following:
Use the organization page
To manage organization membership, use the Organization page in the Label Studio UI. When you sign up for Label Studio Enterprise for the first time, an organization associated with your account is automatically created. You become the owner of that organization. People who join Label Studio Enterprise from an invitation link or with an LDAP or SSO role join an existing organization.
If permitted by your Label Studio Enterprise plan, you can create organizations in Label Studio to further separate access to data and projects. For example, you could create separate organizations to separate work and access between completely unrelated departments. If some departments might collaborate with each other on a project, you can use one organization for both and instead use workspaces to organize the projects that they might or might not be collaborating on.
For example, you might set up one of the following possible configurations:
One organization for your company, with one workspace for the support department and another for the development team, with specific projects in each workspace for different types of customer requests.
Figure 3: Label Studio with one organization with multiple workspaces and projects within each workspace.Multiple organizations, such as one for the customer claims department and another for the customer support department, with specific workspaces in each organization for specific types of insurance, such as home insurance claims and auto insurance claims, and specific projects in each workspace for types of claims, such as Accident Claims, Injury Claims, Natural Disaster Claims. The Customer support organization might have workspaces specific to the types of support queues, with projects for specific types of calls received.
Figure 4: Label Studio with three organizations, each one with multiple workspaces and projects within each workspace.
When you assign a user role to an organization member, they hold that role for all workspaces and projects for that organization.
Managers within an organization can see all workspaces in that organization, even if they don’t have access to perform actions in them. Annotators and reviewers can only see projects, not workspaces.
If you have access to multiple organizations, use the Organizations page to switch between the organizations that you are a member of.
Workspaces
Workspaces are a key differentiating factor between open-source and enterprise versions, providing powerful capabilities to organize, categorize and manage projects at different stages of their lifecycle or use case.
While projects contain tasks, workspaces contain projects. Besides using workspaces to organize projects, you can also manage user access to workspaces or to specific projects contained in workspaces.
Create workspaces to organize projects
Within an organization, owners, administrators, and managers can create and manage workspaces. Workspace managers can only manage workspaces that they create or have been added to.
Create a workspace to organize projects by doing the following:
In the Label Studio UI, click the
+sign next to Workspaces in the menu.
Figure 5: Click the + sign.
Name the workspace, and if you want, select a color.
Click Save.
Figure 6: Name the workspace.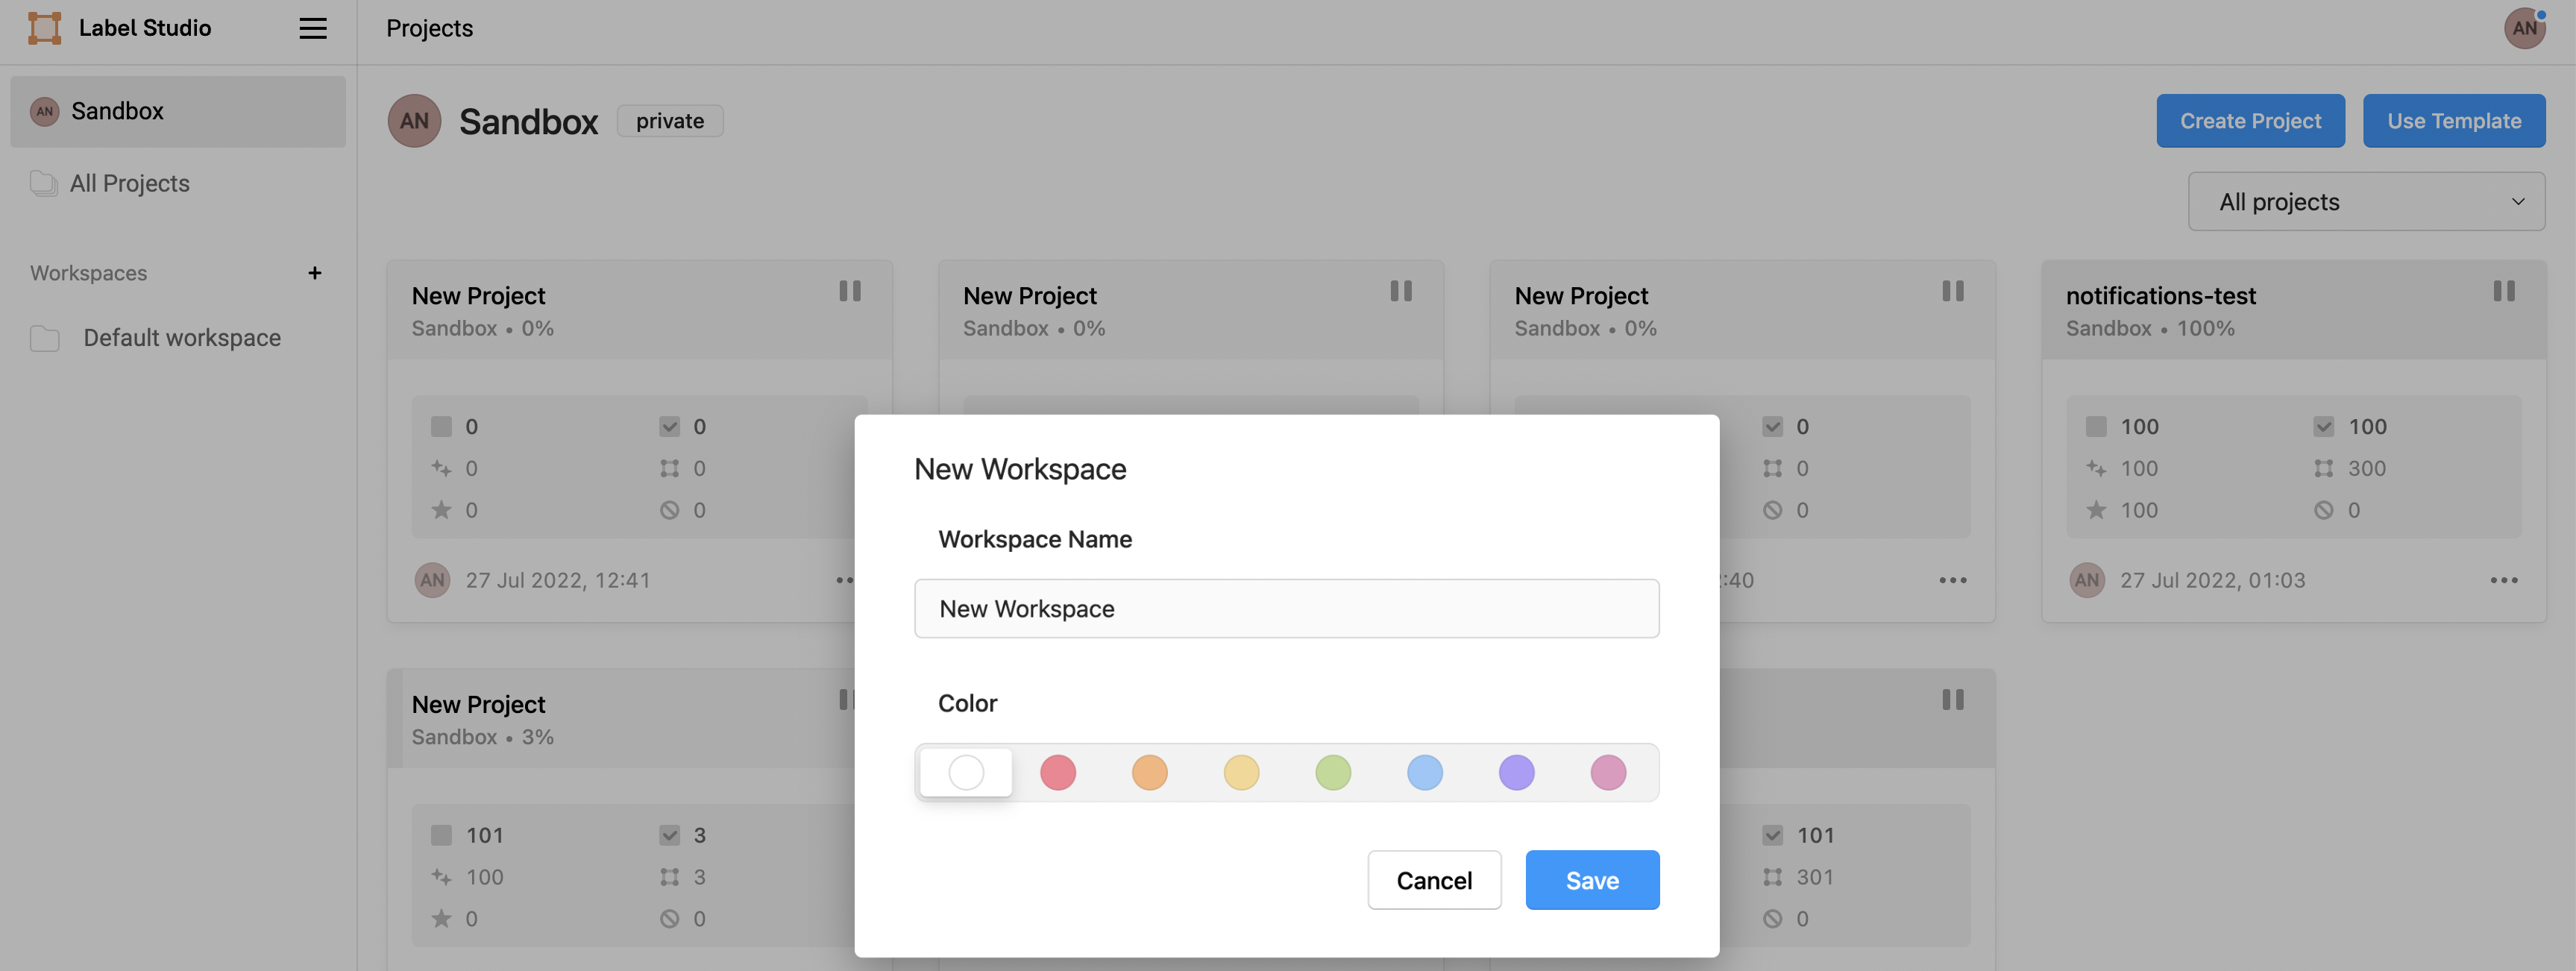
After creating a workspace, you can create projects for that workspace, or use the Project Settings page to move a project to the new workspace. Your private sandbox also functions as a workspace, but only you can see projects in your sandbox.
Add or remove members to a workspace
From a specific workspace inside the Label Studio UI, do the following:
- Click Manage Members.
- Use the search functionality to locate the user that you want to add to the workspace.
- Select the checkbox next to their name and click the
>arrow so that they appear in the list of users that Belong to the Workspace. - Click Save.
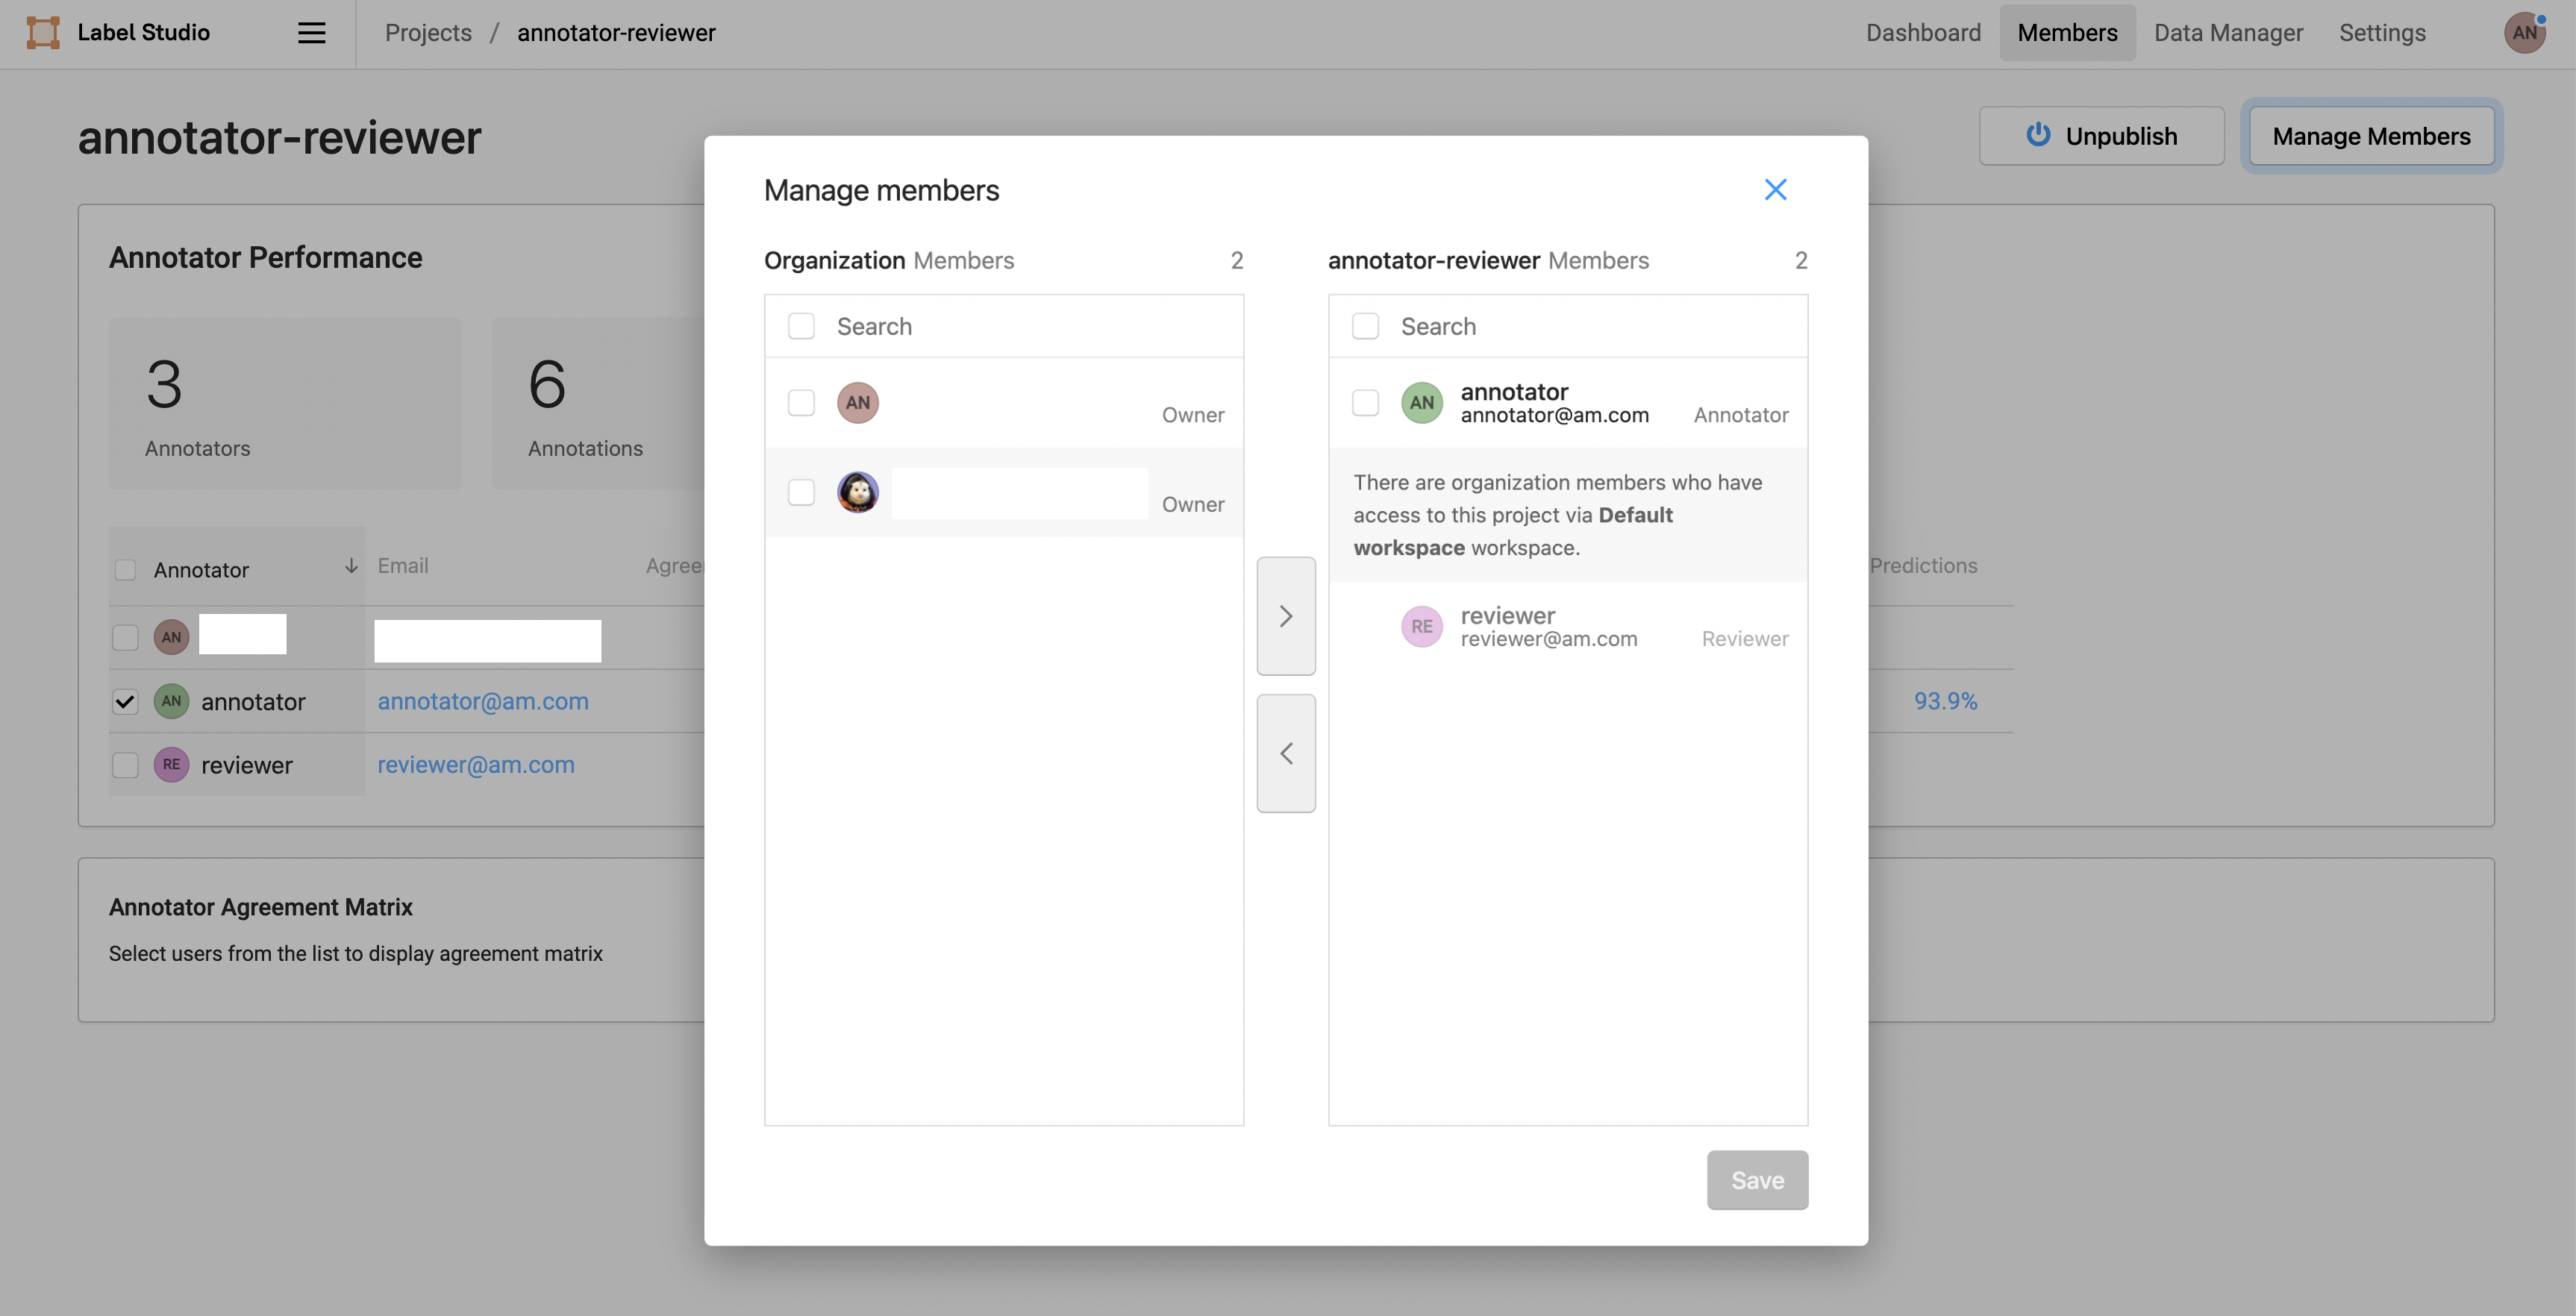
You can also remove yourself or other members from a workspace by following the same process and removing members with the < arrow.
Sandbox workspace
Each user has a personal Sandbox workspace that they can use to experiment with project settings and get familiar with Label Studio. After you set up a project and want others to collaborate on it with you, you can update the project workspace in the Project Settings. You cannot add members to your Sandbox workspace.
More menu to Pin or Unpin and Duplicate projects
Use the more menu (three dots (…) located in the bottom-right of each project card) to explore the following features:
Pin or Unpin projects
You can pin a project to the top of the page and unpin a project too. The Pin project and Unpin project feature allows you to filter and find projects of interest.
Roles and Capabilities
This section describes the user roles and capable actions on the Pin project and Unpin project feature by using the Label studio UI.
As an Organization Admin and Reviewer in Label Studio UI, you can do the following:
- View all your pinned projects.
- View all the pinned projects by other administrators.
- Aware that a project is pinned because of the label in the project card.
- Unpin a pinned project from the menu on the card.
- Pin an unpinned project from the menu on the card.
- See a temporary notification about the action that you have performed.
- While the notification is visible, you have the ability to undo the action.
- Pin an unpinned project.
- Aware that you pinned a project because it will display at the beginning of the list.
- Aware that a project is pinned because the label will be visible on the card.
- View all projects by selecting the option in the filter.
- The display order shows the pinned projects first, then all other projects.
- Paginate through pinned and unpinned projects.
- If filter is applied to view pinned projects, they will display first in order.
- When you paginate and there are not enough pinned projects to display, you will see all other projects.
- View projects by workspace, including projects that you and other administrators have pinned.
note
If there are no available pinned projects, all other projects will display.
As an Annotator in Label Studio UI, you can do the following:
- View projects that have been pinned by people with permissions.
- Cannot manage pinning or unpinning projects.
- Filter projects.
- See when there are no pinned projects
- Support copy is not available because permissions are not granted to perform those actions.
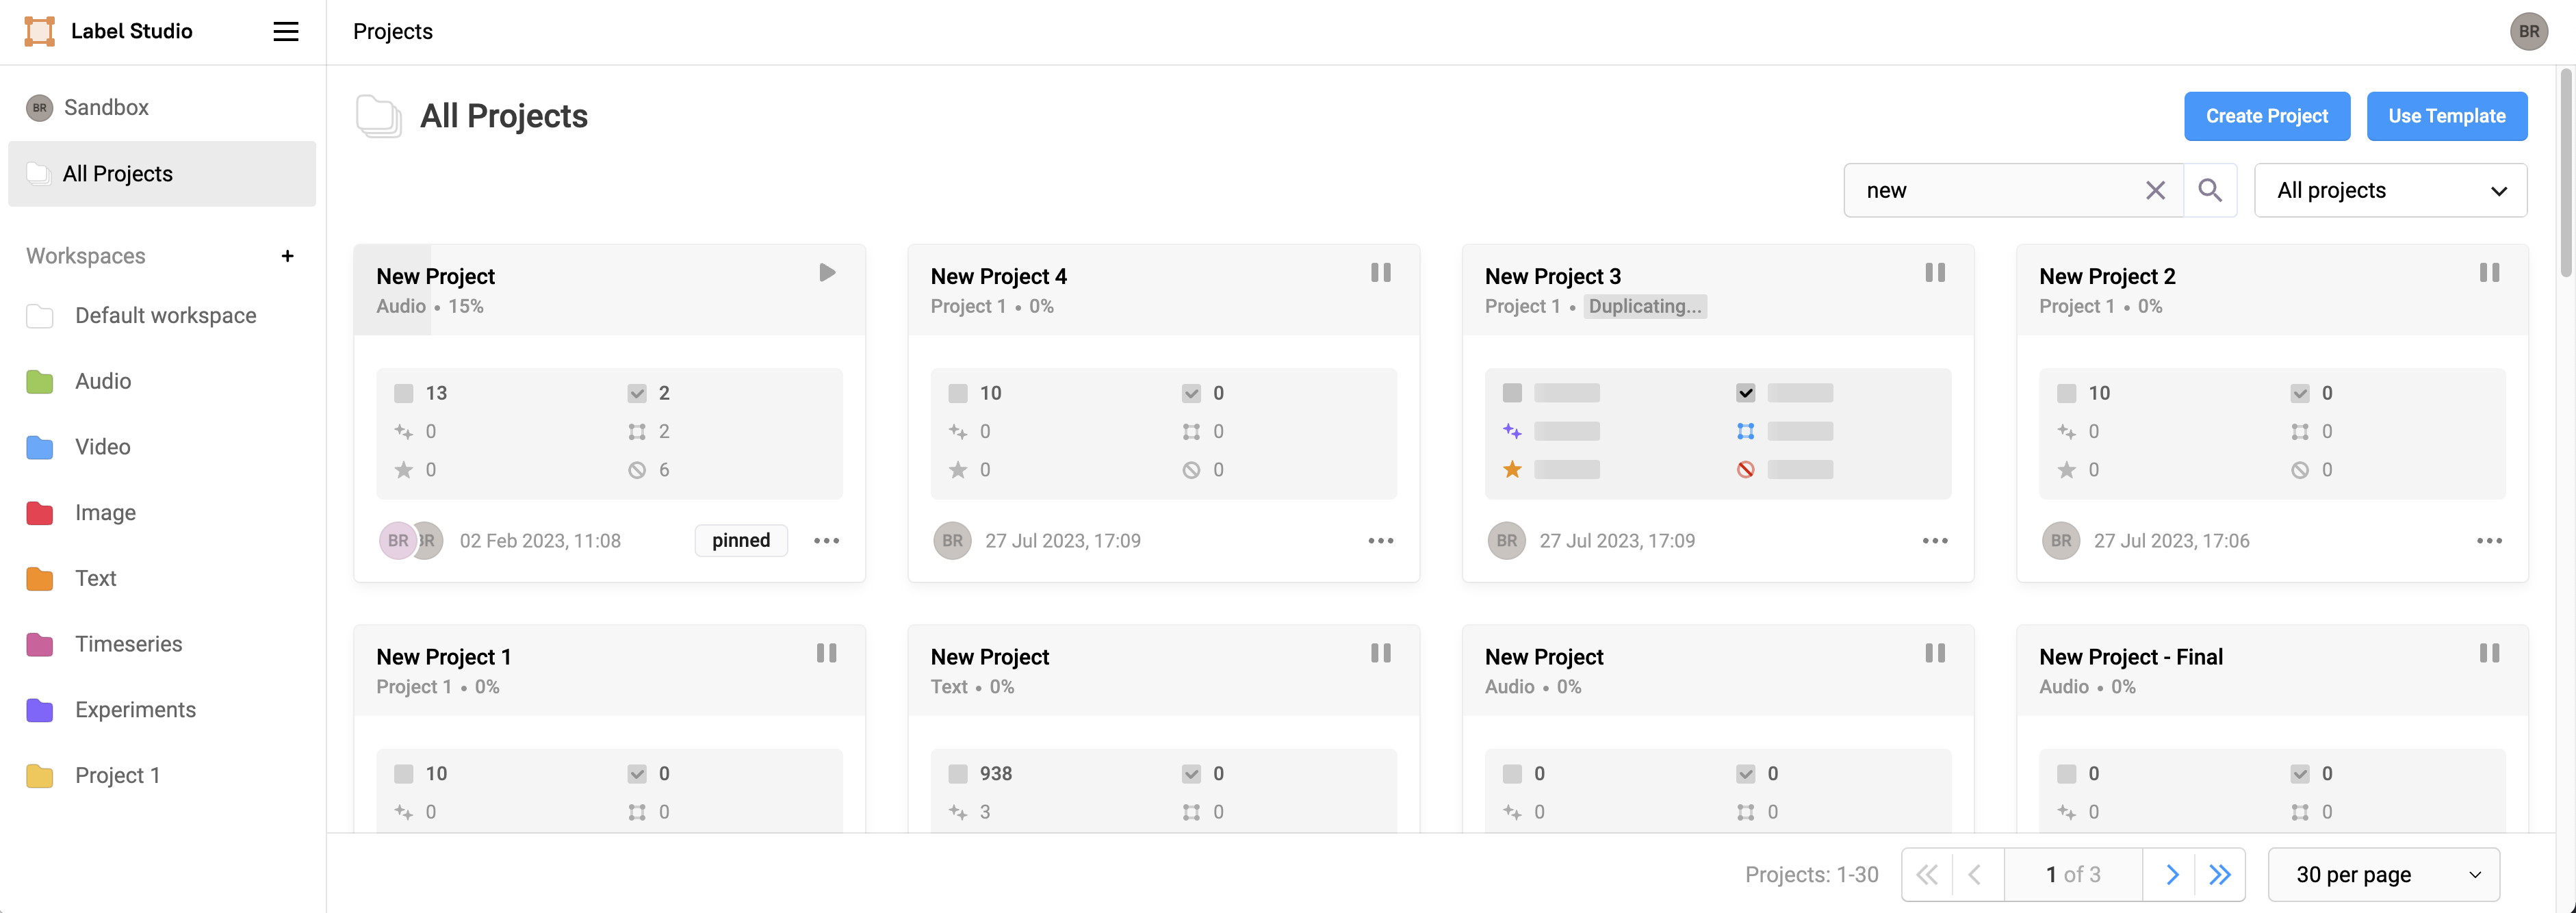
To pin or unpin projects:
- In the Label Studio UI, click All Projects to see all the projects in one place.
- Click on the more menu (three dots … located in the bottom-right of each project card) to see the following options.
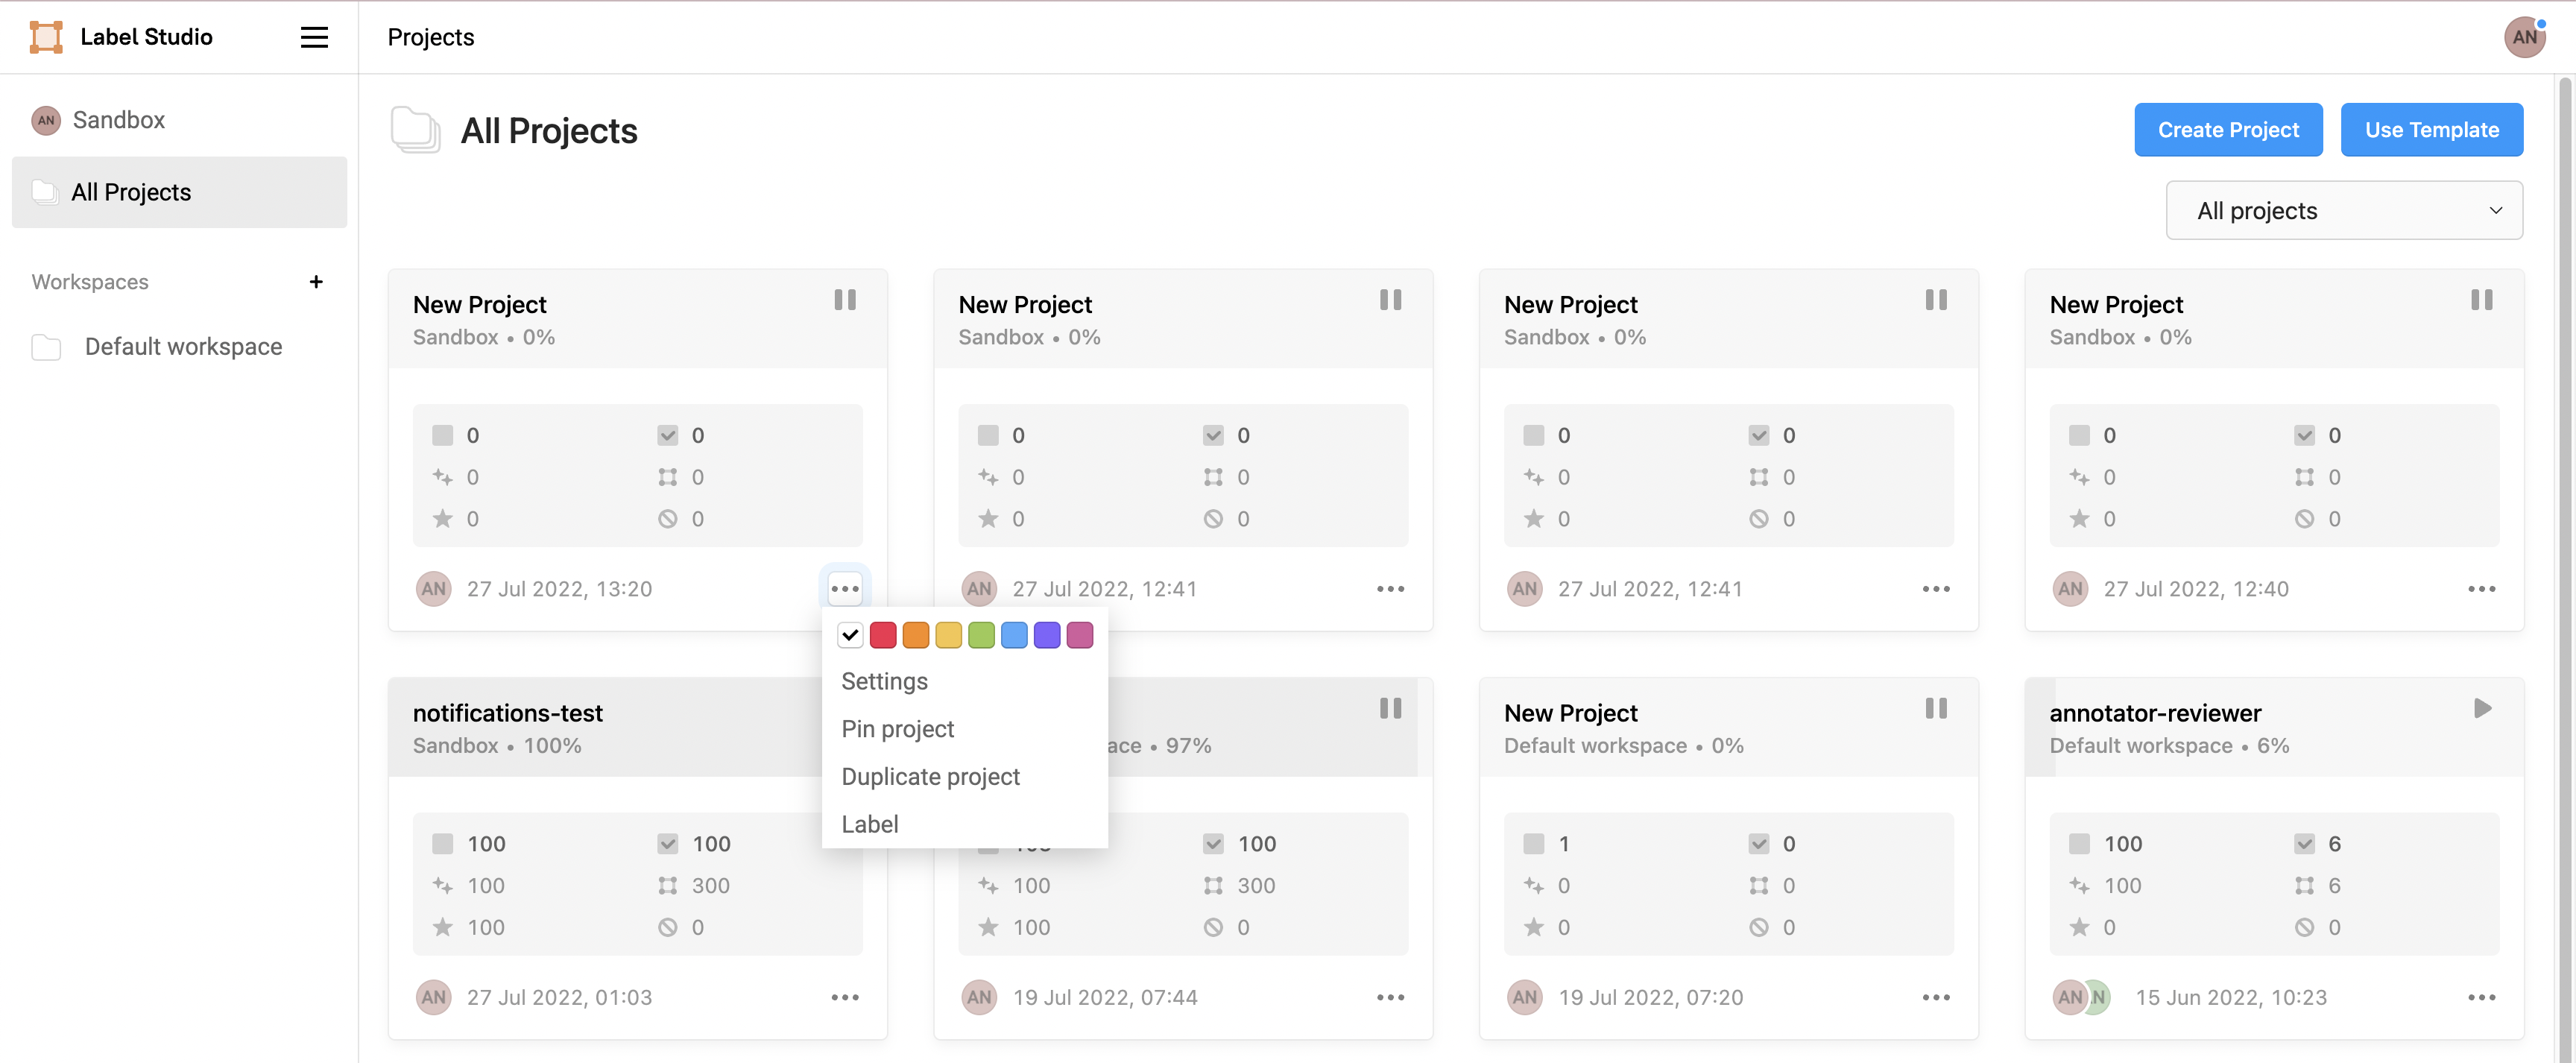
- Click Pin project to pin your projects.
note
When you pin a project, a message (for example, New Project was pinned) is displayed at the bottom of the page to confirm that your project is pinned. - Click Undo near the message to undo this action.
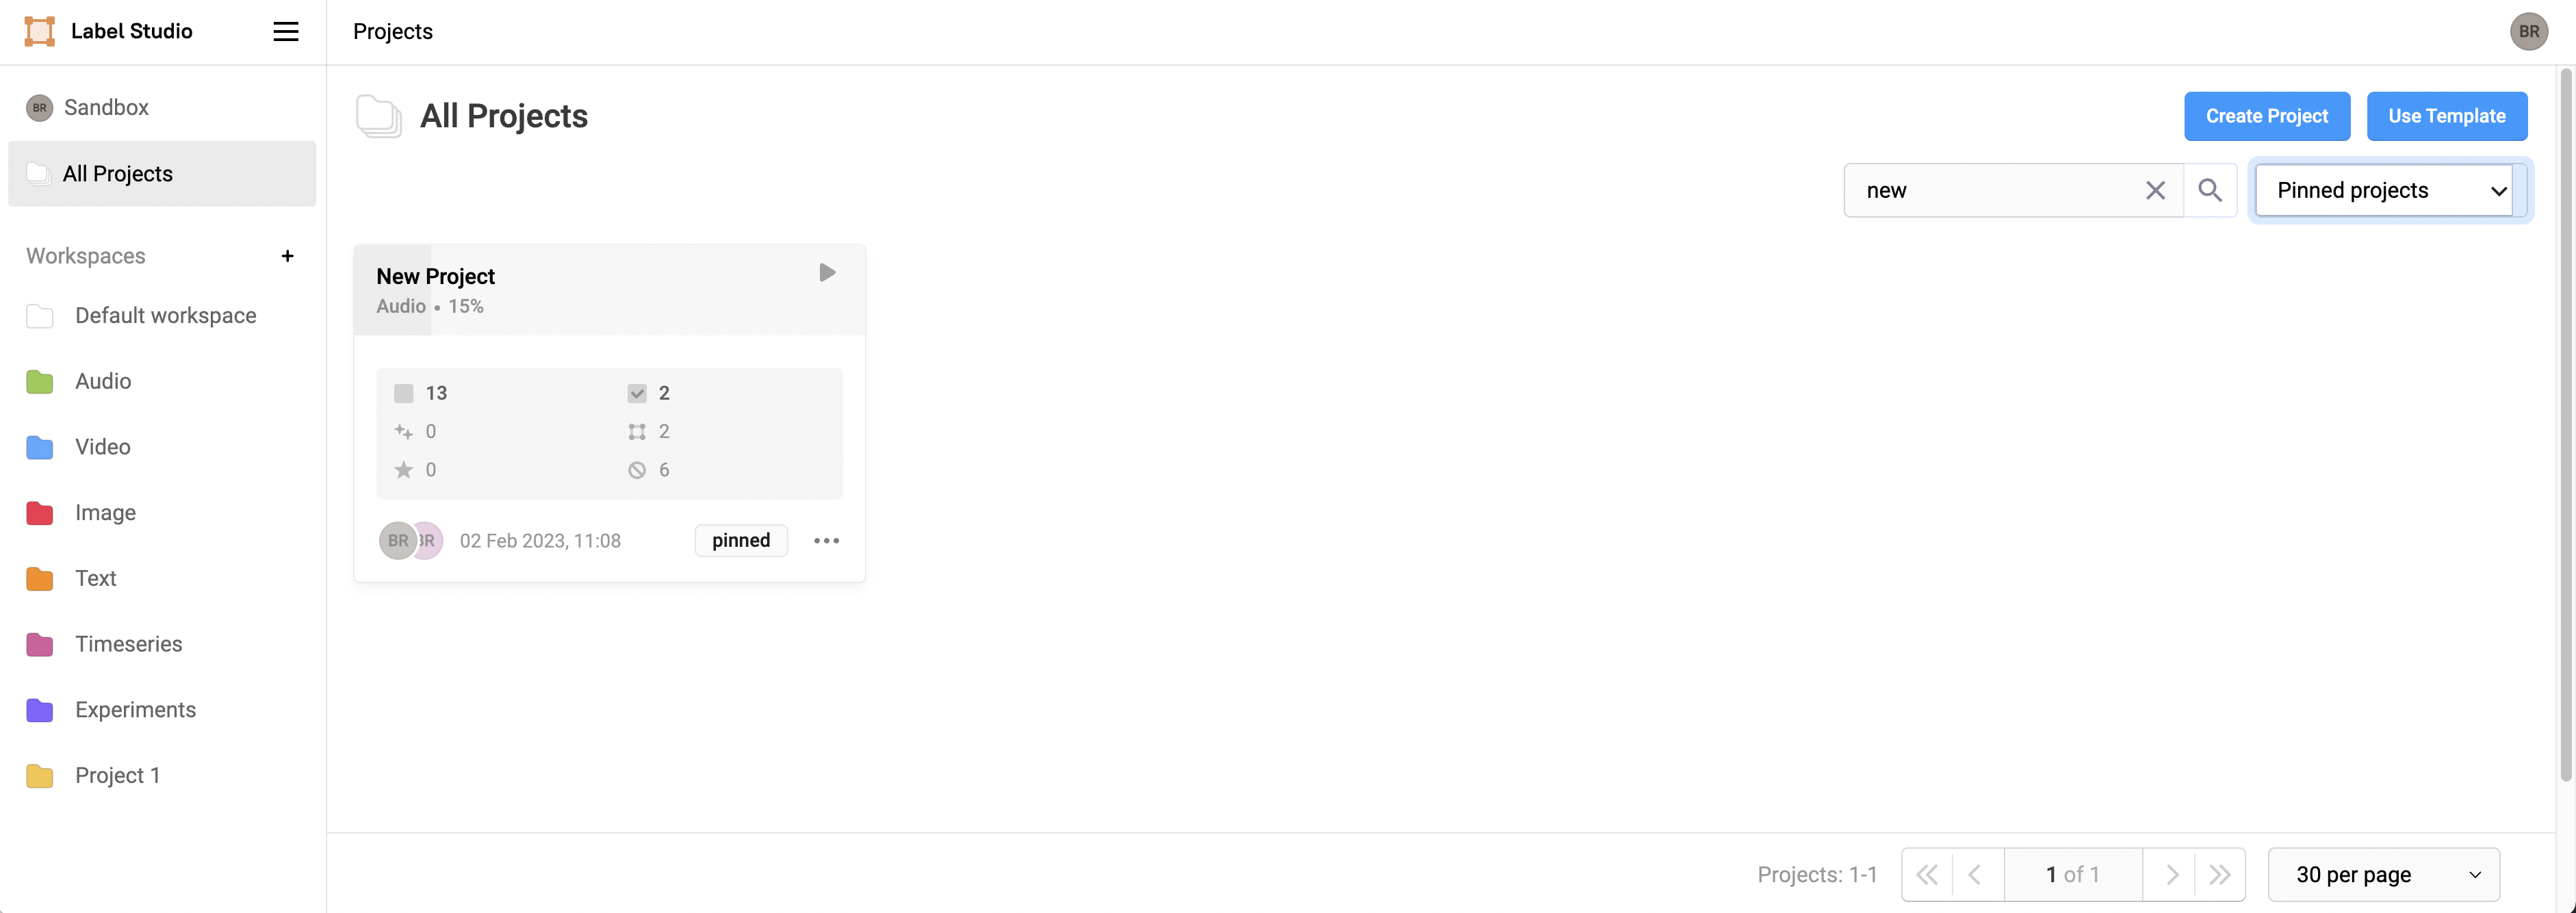
- To filter and display only the pinned projects, click Pinned projects on the top-right side drop-down list.
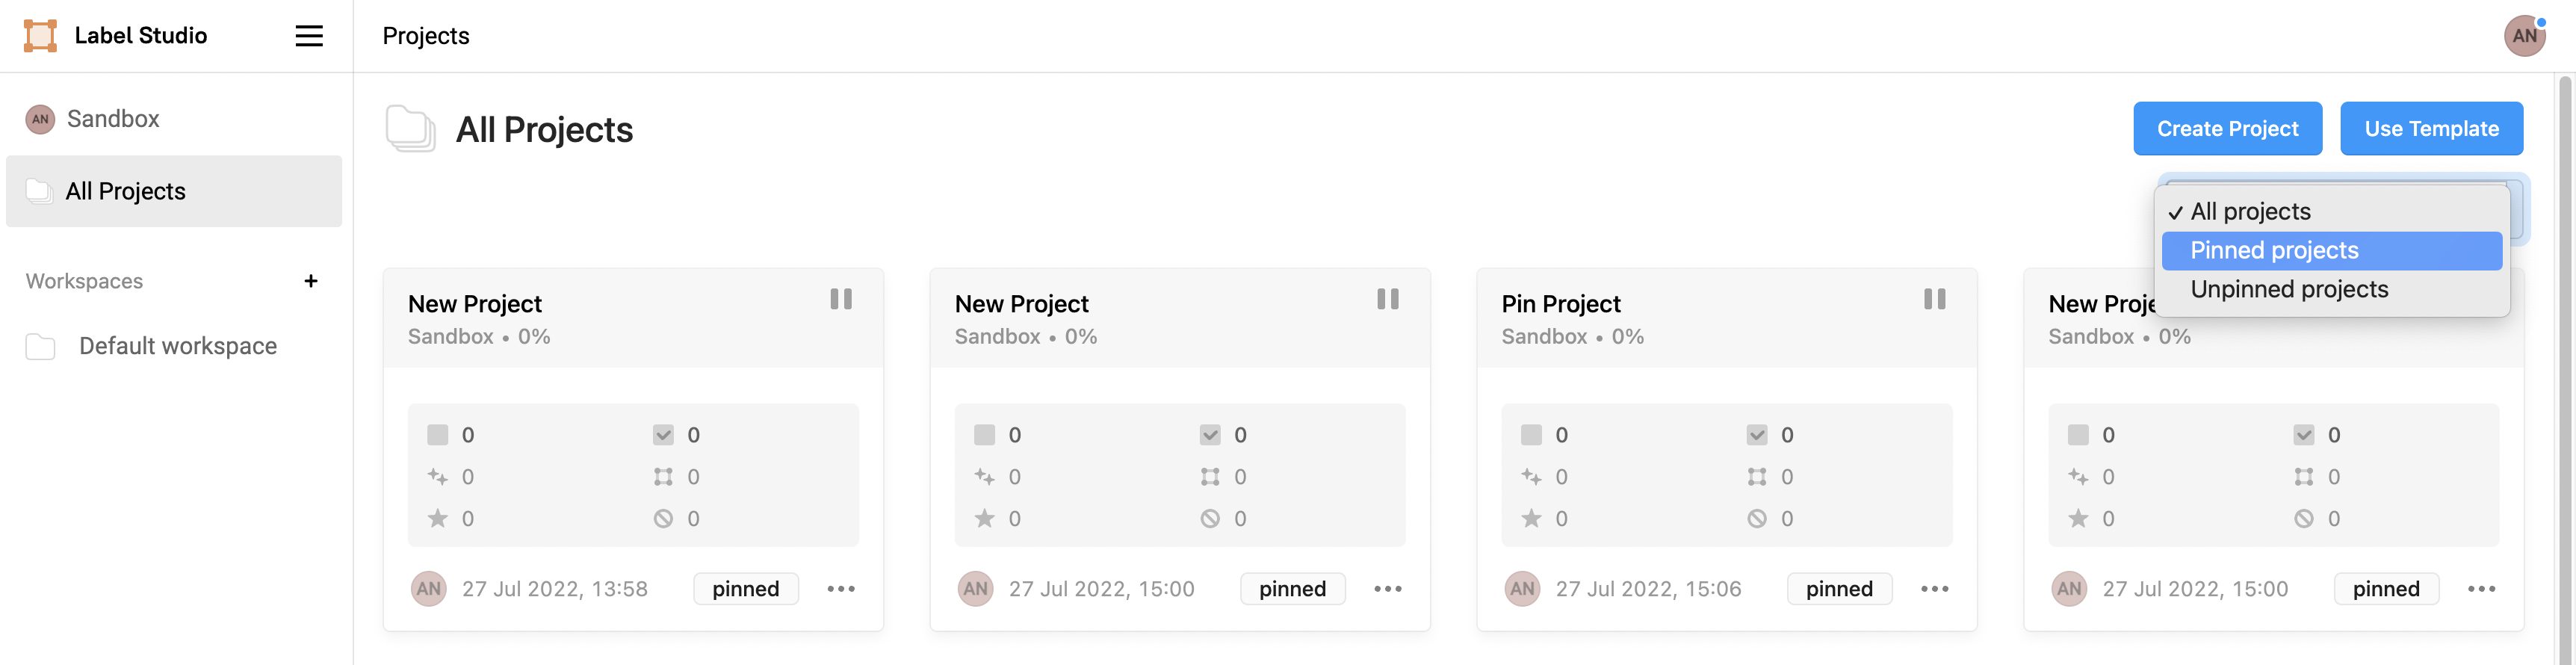
Now, you can see all the pinned projects only.
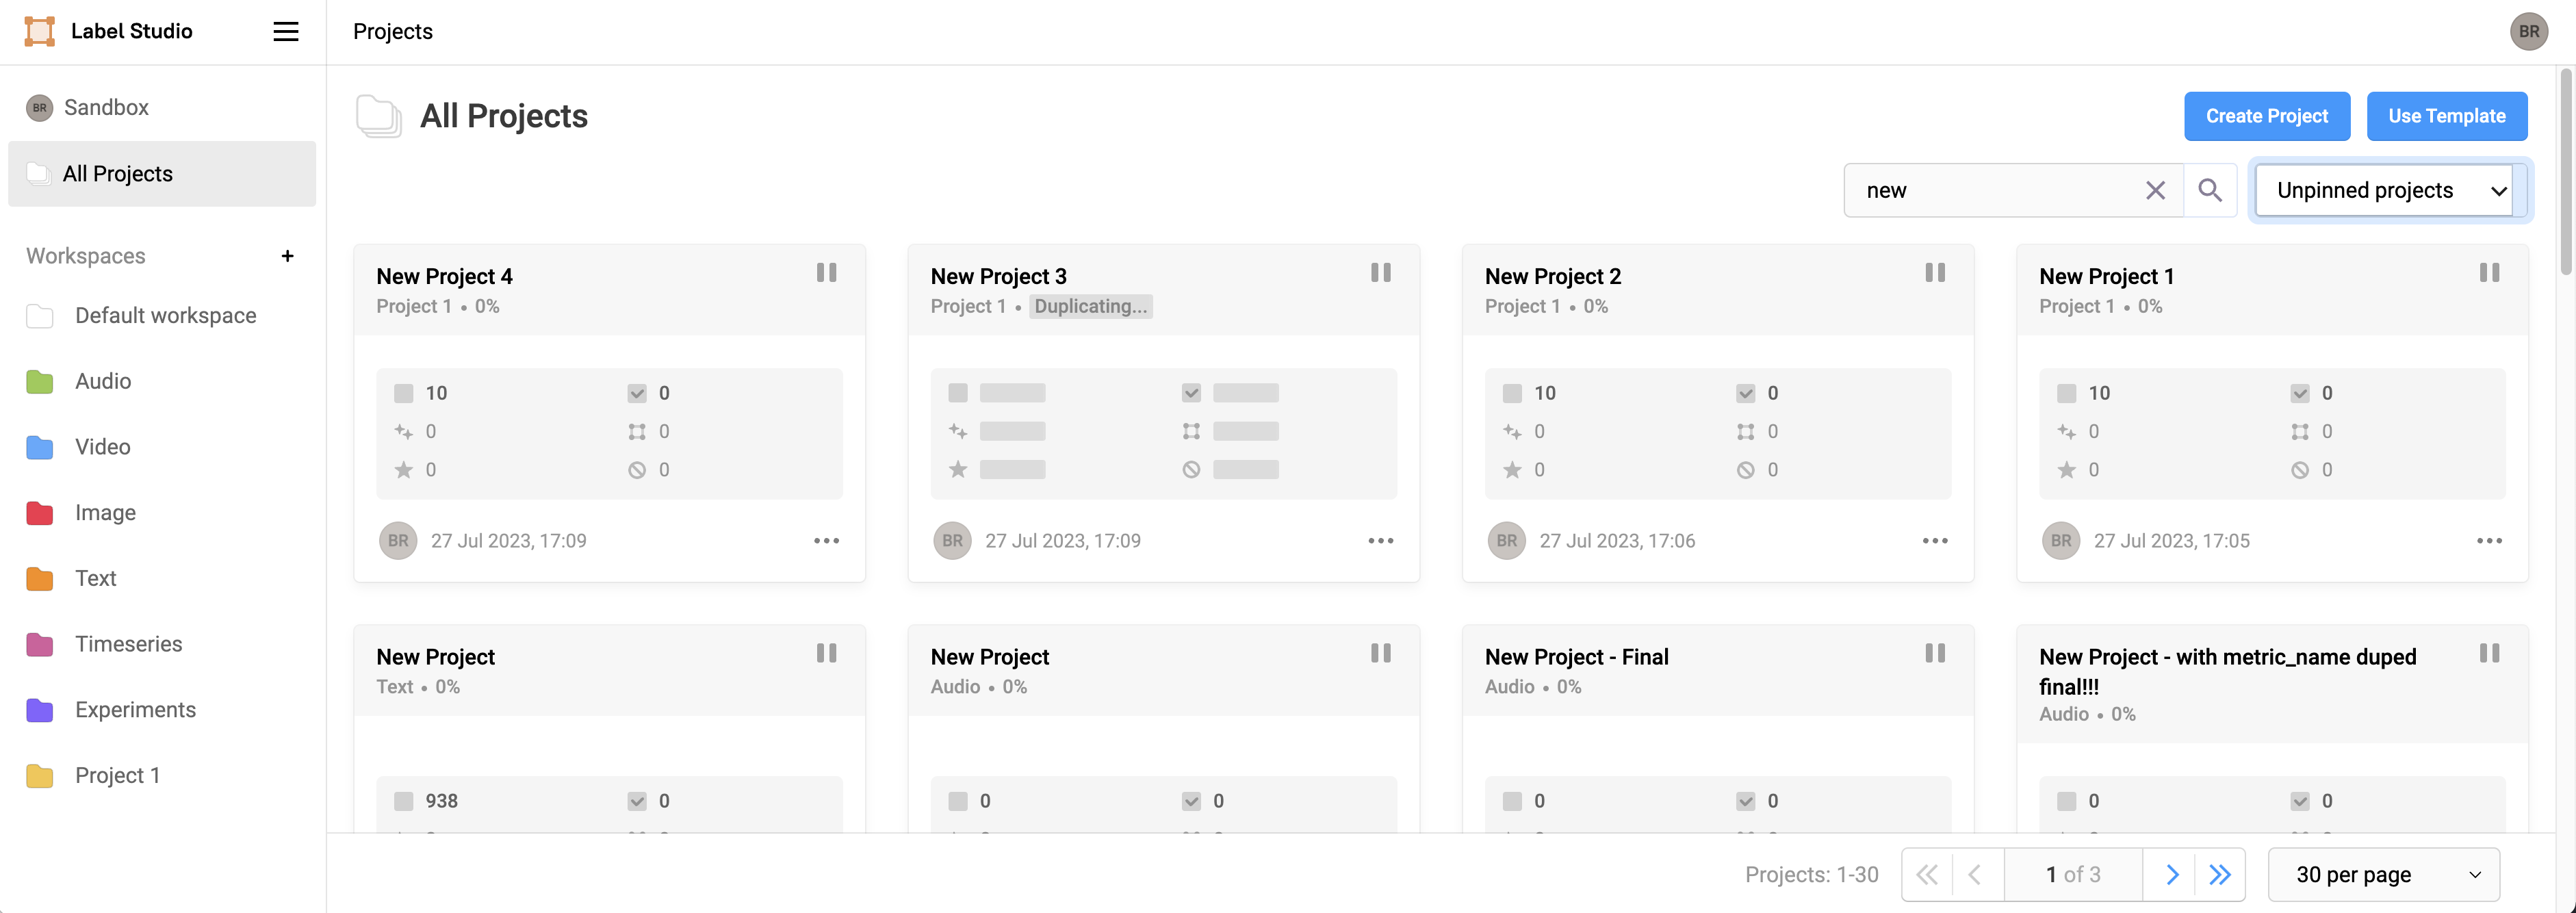
To filter and display only the unpinned projects, click Unpinned projects on the top-right side drop-down list. Now, you can see all the unpinned projects only.
To view all the projects (both the Pinned and Unpinned projects), click All projects on the top-right side drop-down list.
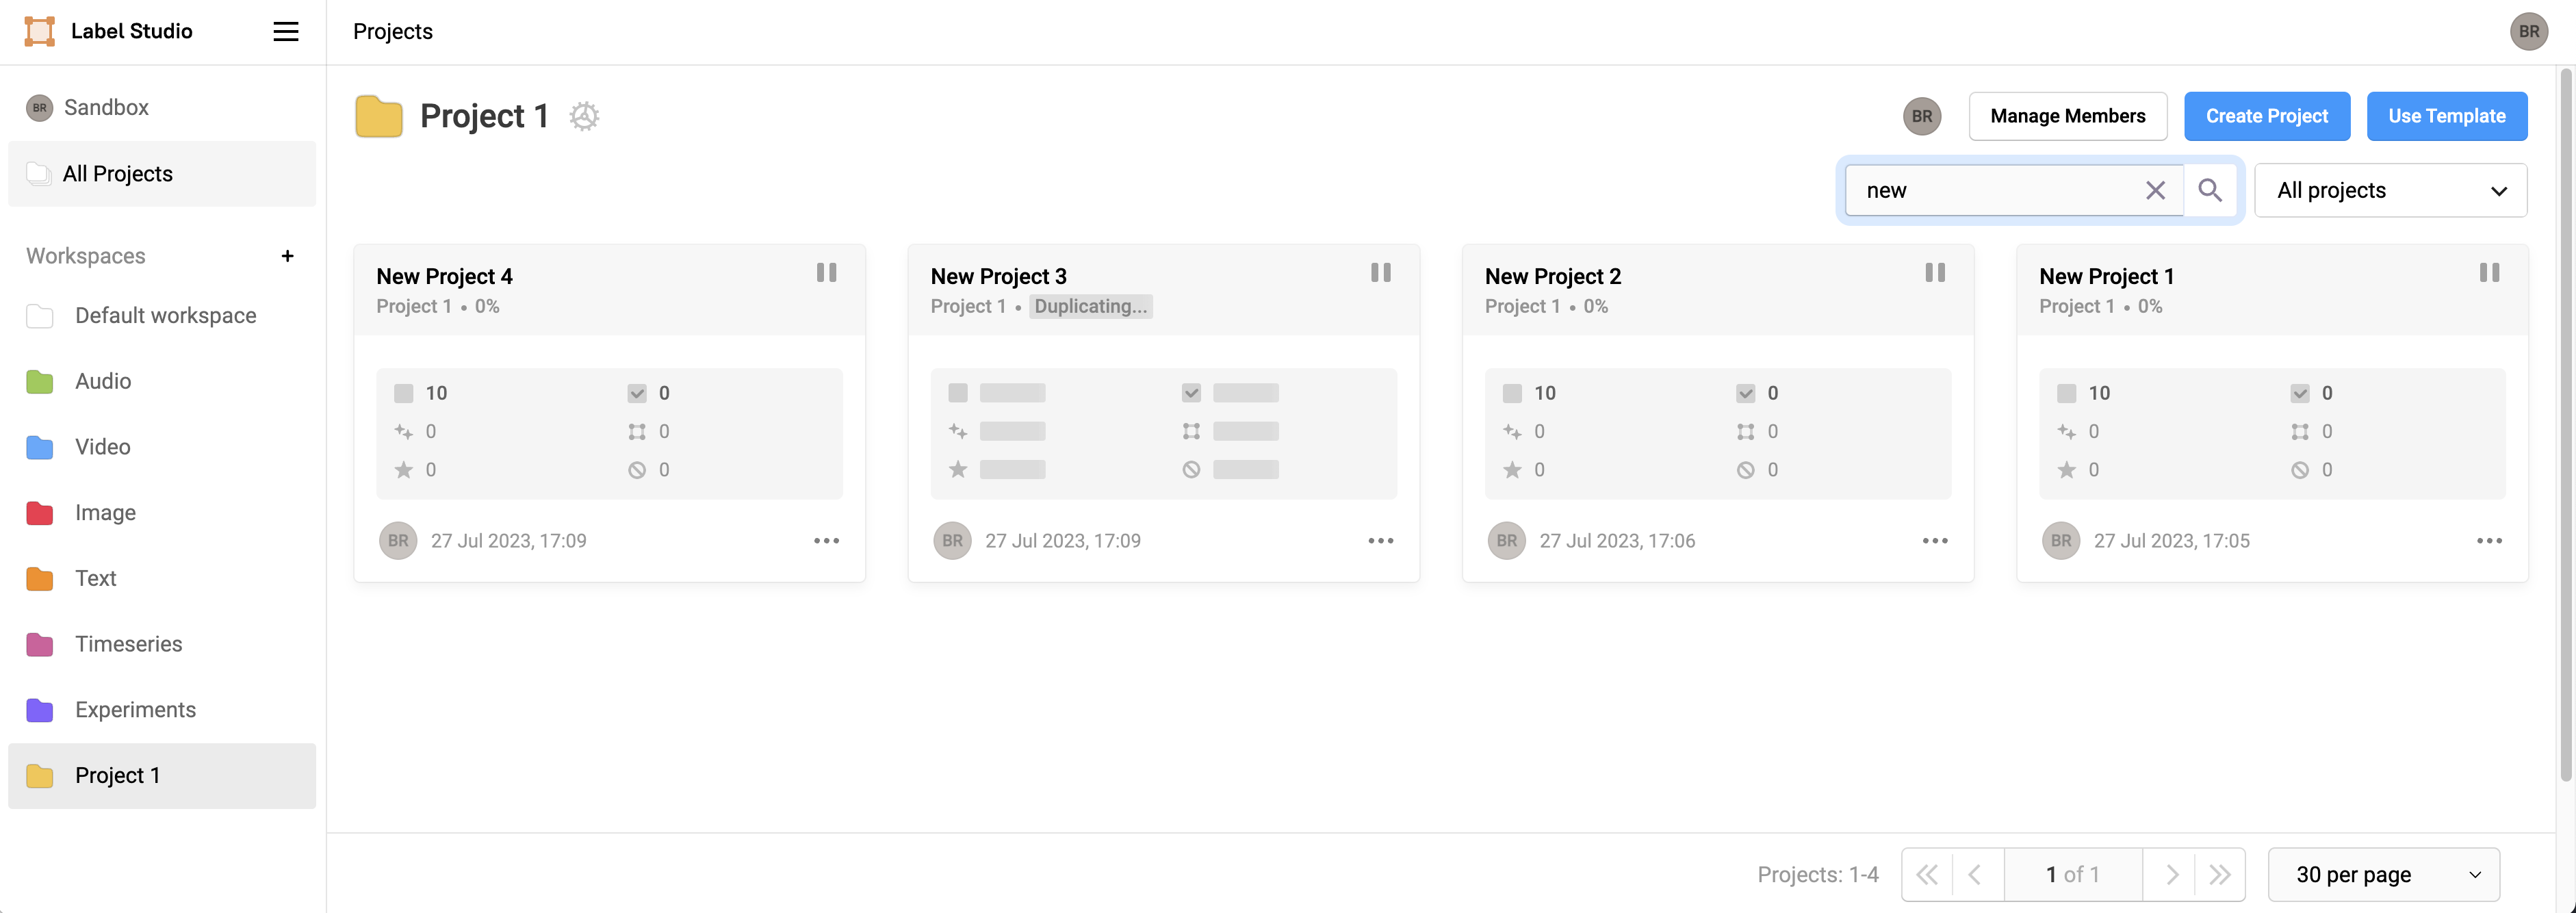
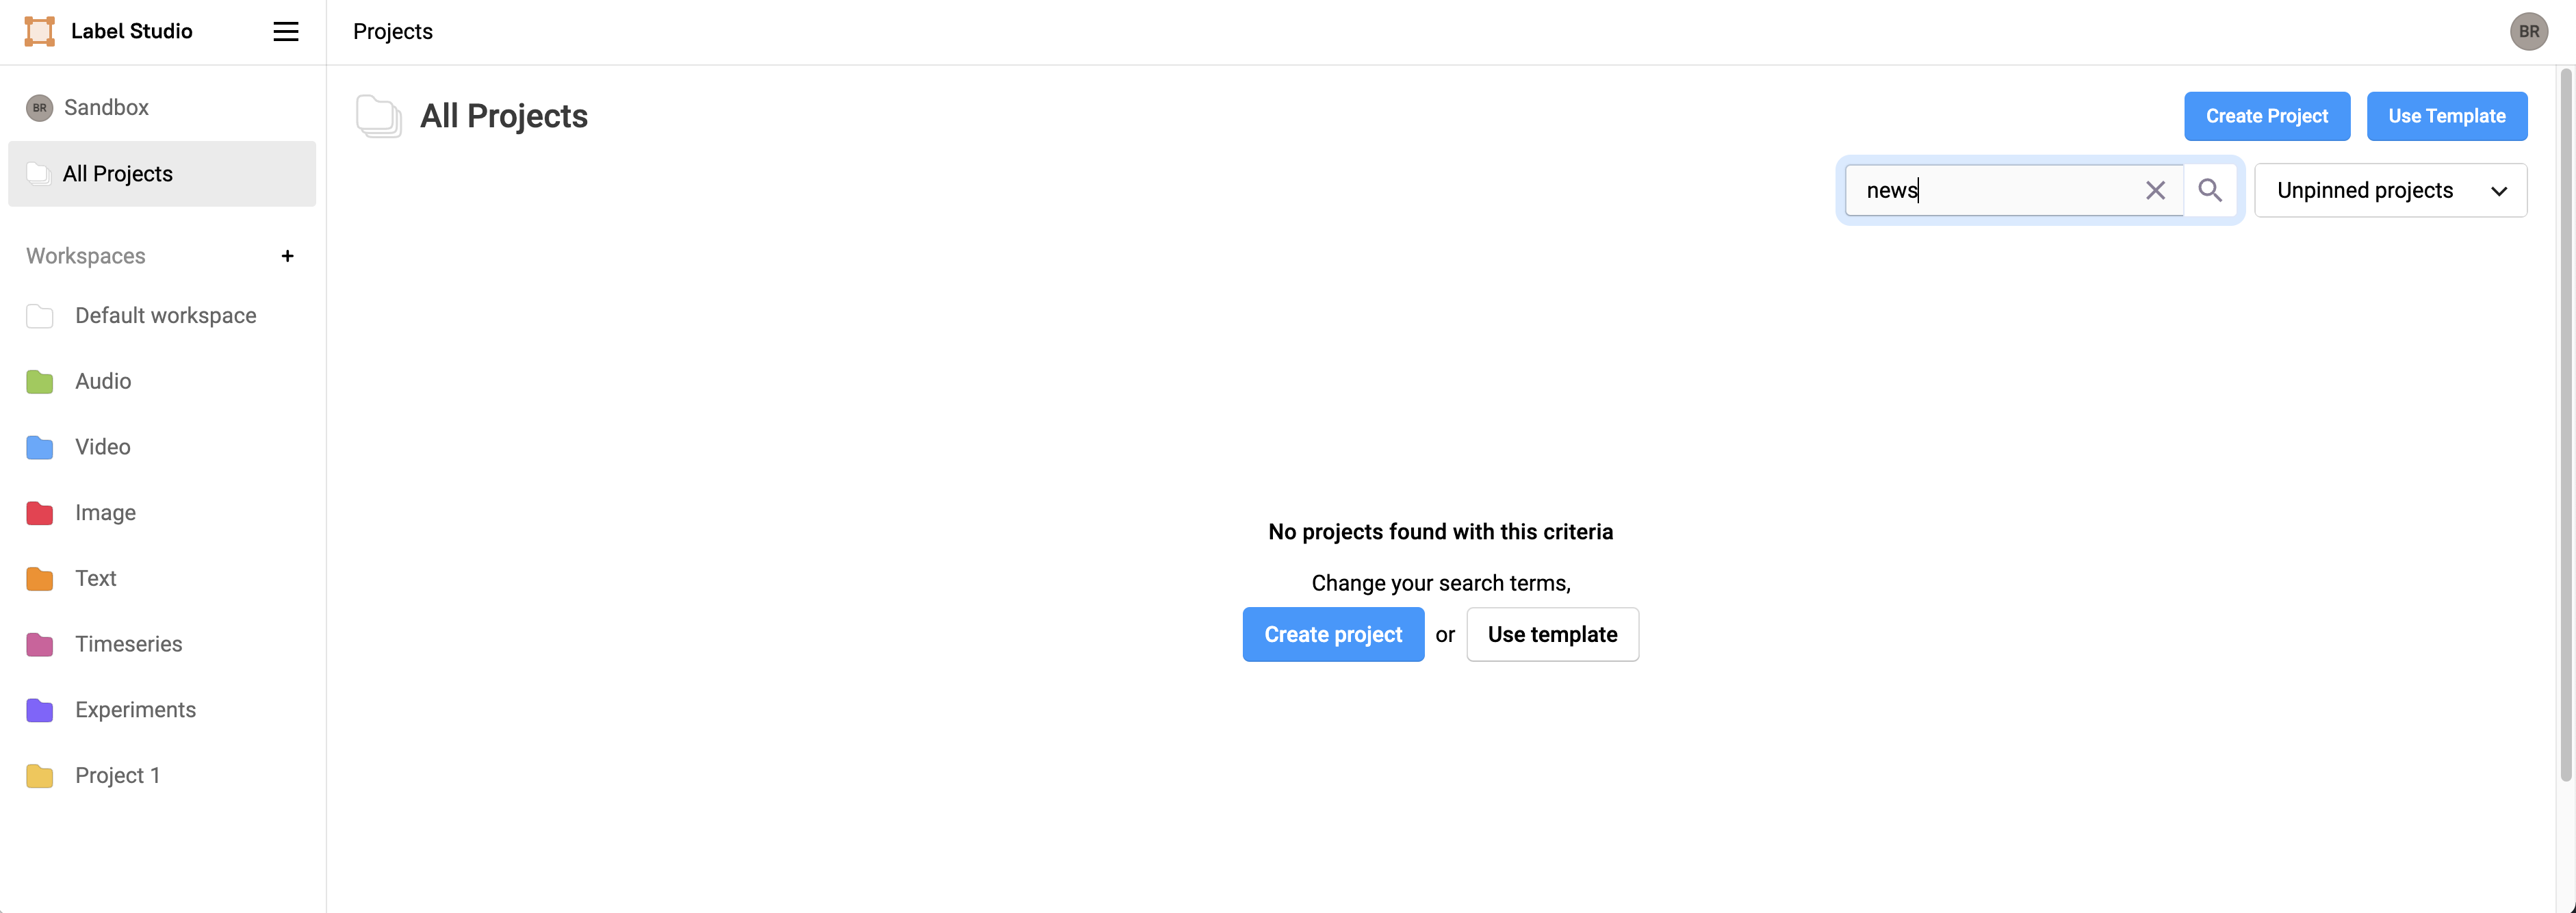
Search projects
Use the search box to search for projects by name. This allows partial and case-insensitive matches. The search is performed as you type, and the results are displayed in the project list. For example, if you type new in the search box, you will see projects with names such as New Project, New Project 2, and New Project 3.
- Search for a project by name in a workspace.
- To search for a project by name in all workspaces, click All Projects from the left navigation pane.
- To clear the search results, click the
xicon in the Search box.
- Searching for pinned, or unpinned projects just requires selection of
Pinned projectsorUnpinned projectsfrom the adjacent dropdown selection.
- In the event of no results found for the search and filter criteria you will be presented with a message indicating that no results were found and allowed to create a new project or update the search criteria.
Duplicate a project
The Duplicate project feature allows you to duplicate projects to a target workspace optionally importing the settings, tasks, and annotations. Duplicate a project by using the Project’s settings or Project card’s more menu (three dots …).
To duplicate a project:
Navigate to your workspace page to see the project card with the three dots (…) and click Duplicate project.
Figure 18: Duplicate project button.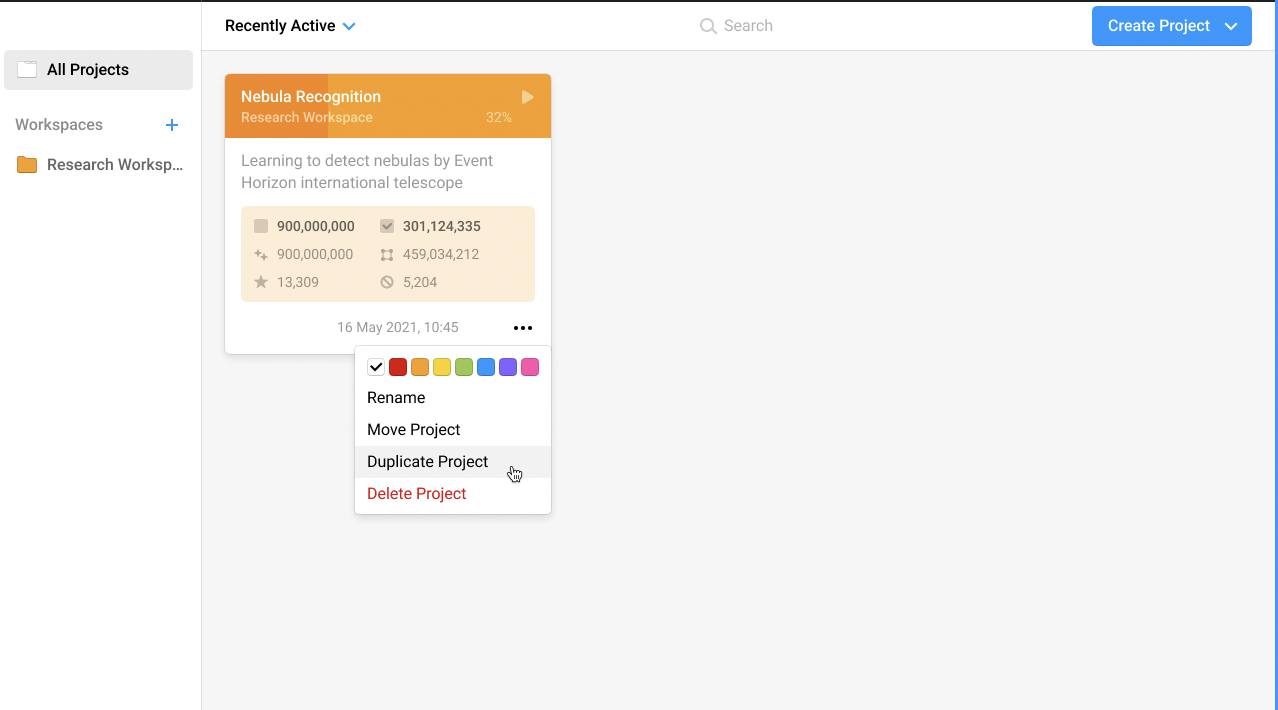
When duplicating, a pop-up window appears. Now, you can choose a destination workspace for a newly duplicated project using the following options:
Duplicate project with only settings.
Duplicate project with both settings and data.
Duplicate with settings, data, and all annotations.
Figure 19: Duplicate project options.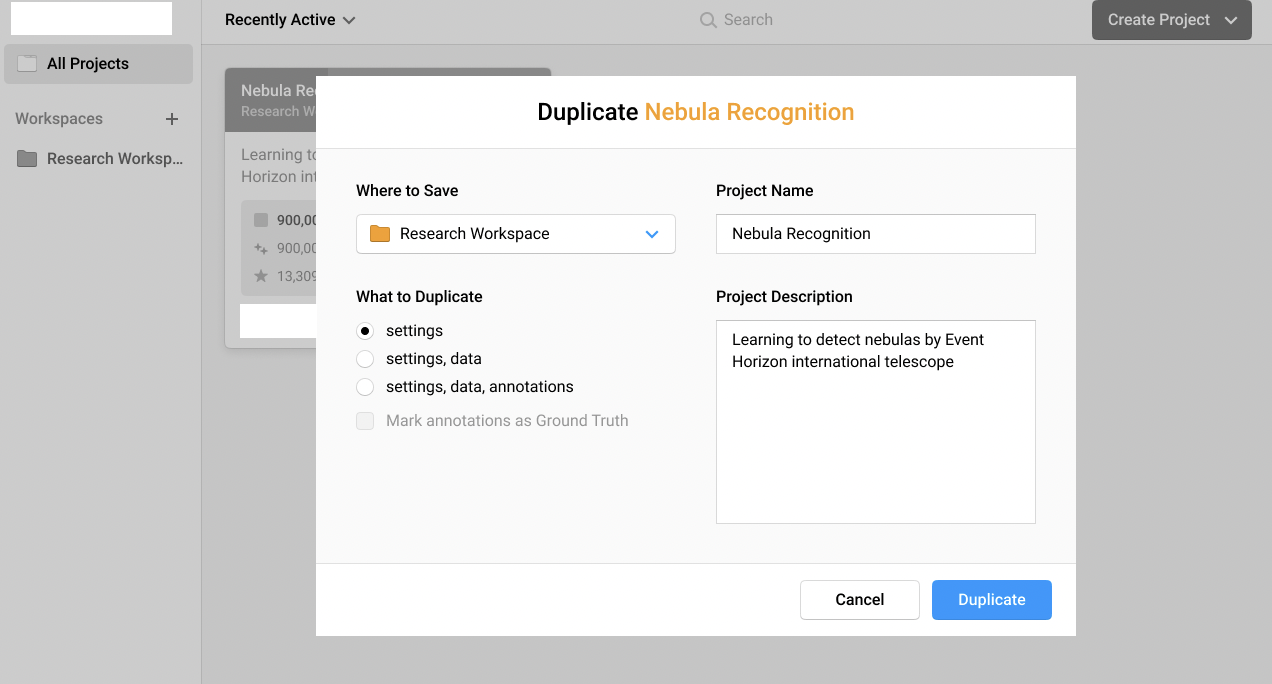
When choosing the last option, you also can choose if you would like to make annotations Ground Truth or not. In the Duplicate window, you can also give duplicated project new name and description.
Figure 20: Select the location to save your duplicate project.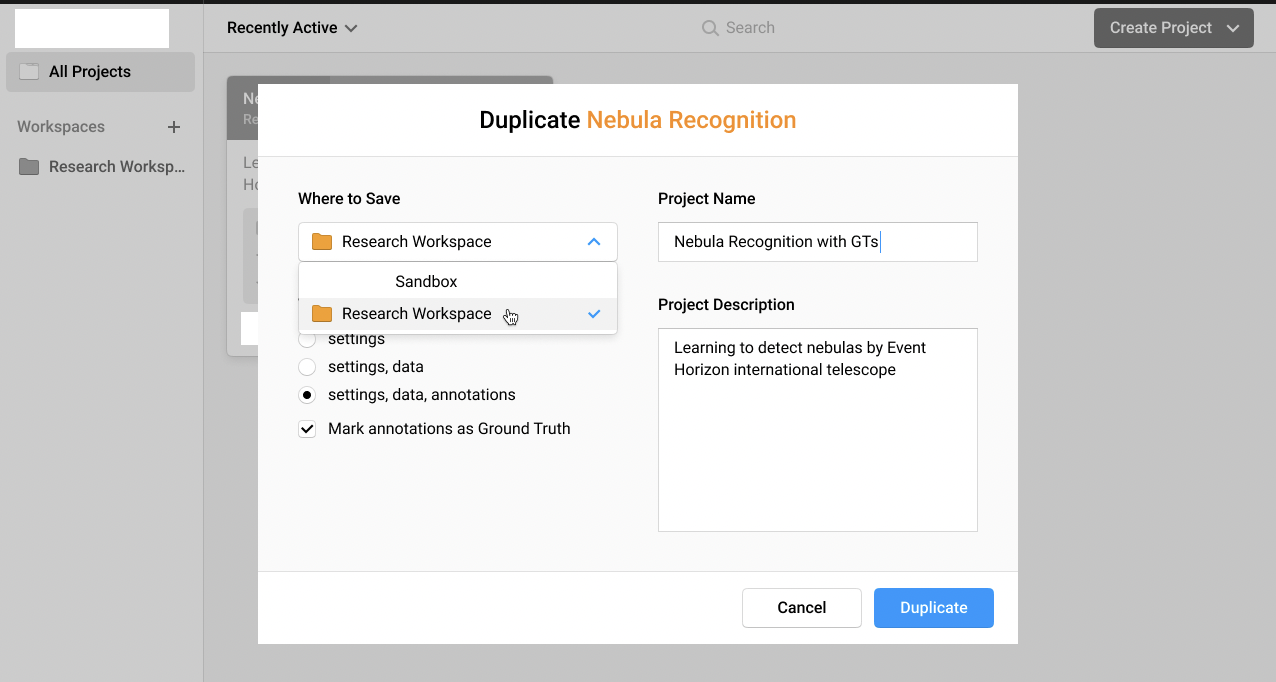
Finally, the duplicated project is created.
Figure 21: Create a duplicate project.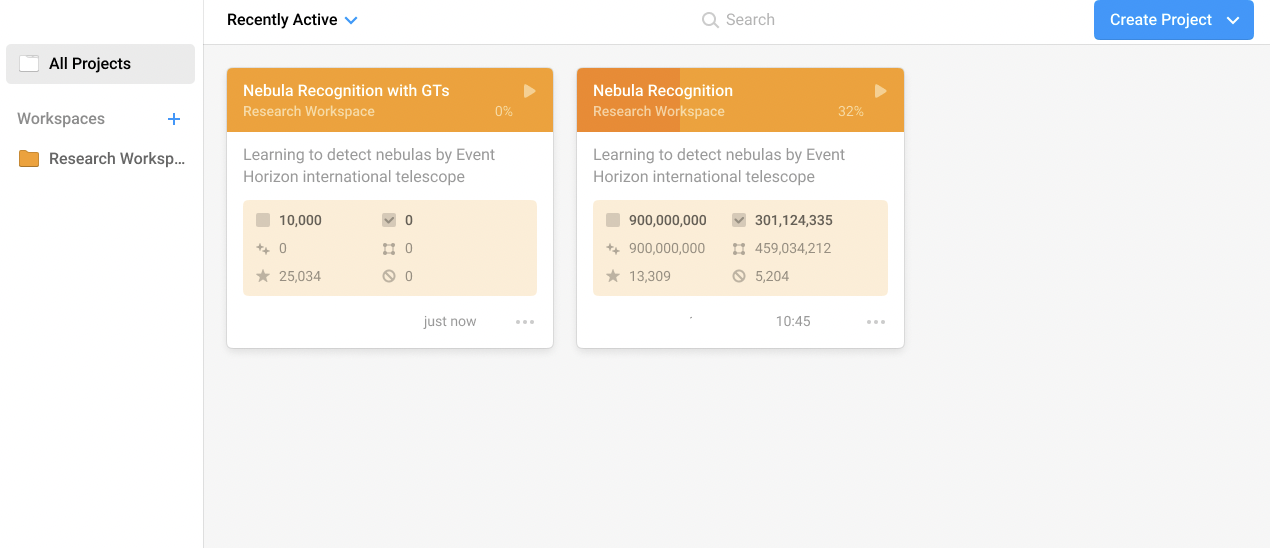
Working with Archived Workspaces
To reduce clutter in the workspace sidebar you can archive one or more workspaces from view, allowing you to easily locate high-priority labeling initiatives. You’ll still have complete access to workspaces that have been archived and you can unarchive them at any time.
Archiving a workspace
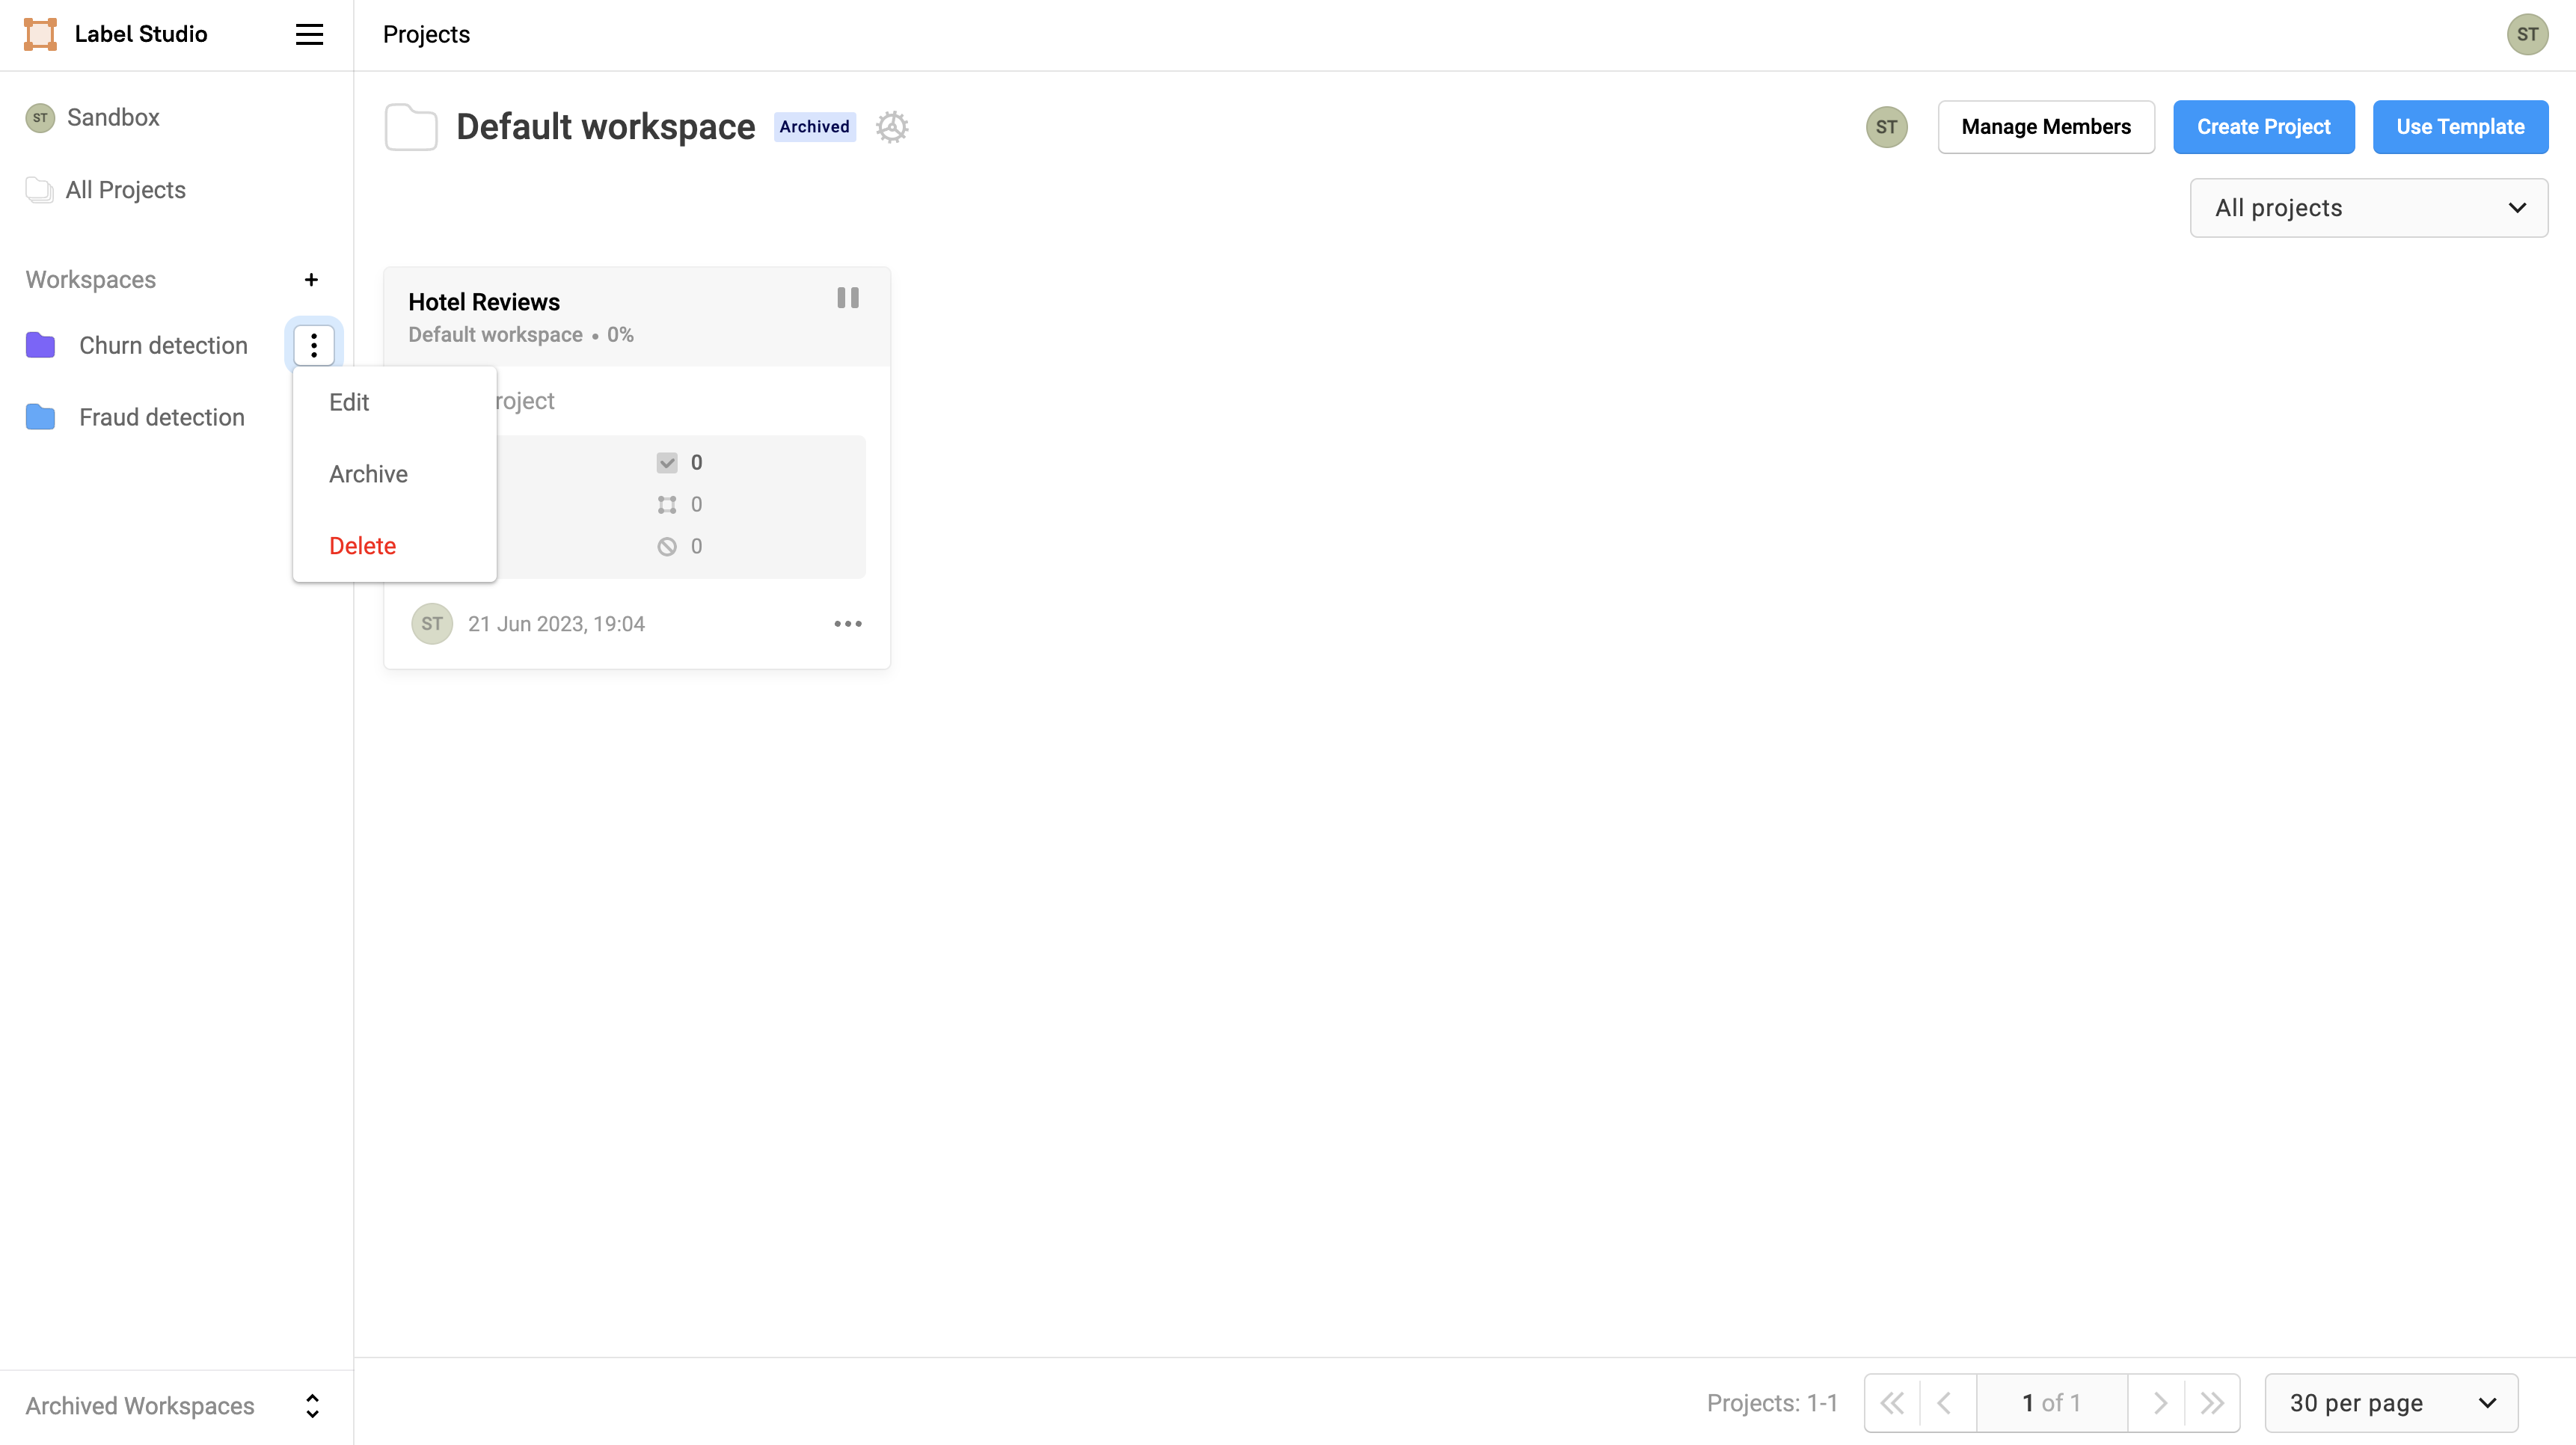
Archived workspaces and the projects they contain can be referenced or worked on as normal, even when hidden from the main view. Simply click the menu next to a workspace name and click “Archive” to hide it from view.
You can also archive a workspace from the gear icon next to the current workspace name which brings up the modal to edit a workspace.

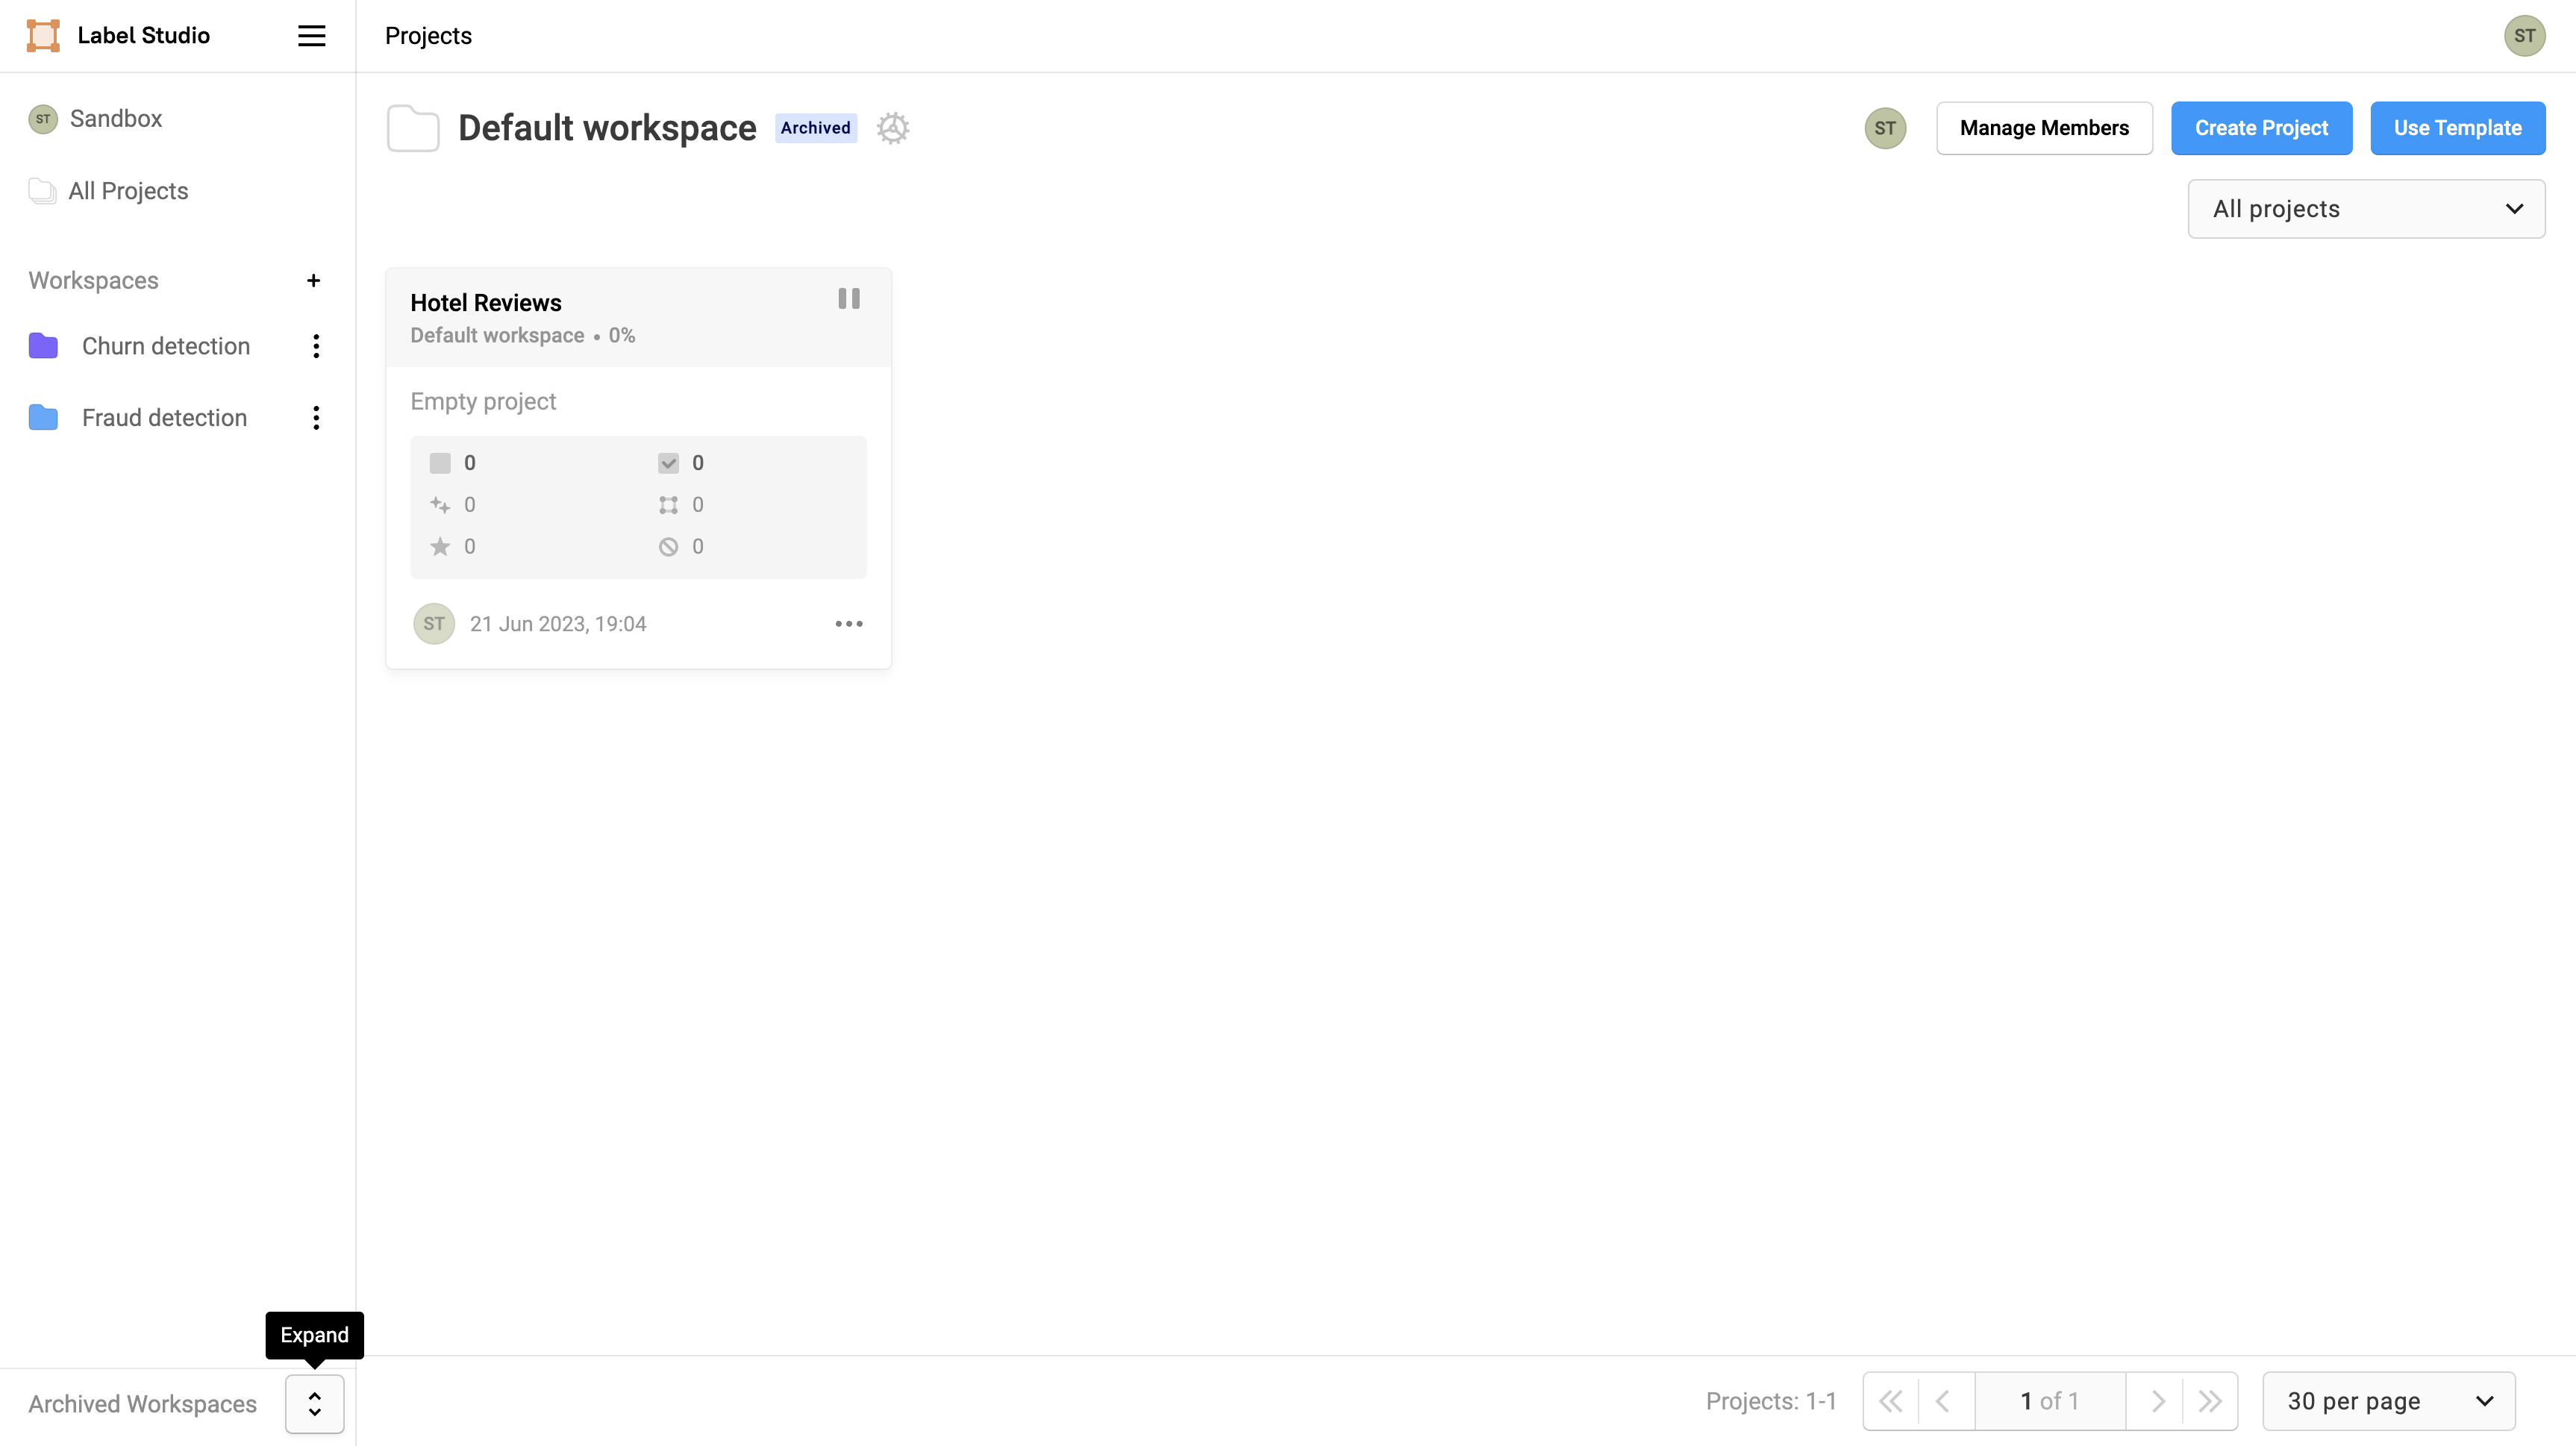
View archived workspace
To view archived workspaces, expand the archived workspaces toggle at the bottom of the project page sidebar.
Unarchiving a workspace
To unarchive a workspace, use the same menu where you initially archived it and click “Unarchive” which will bring the workspace into the normal workspace view.
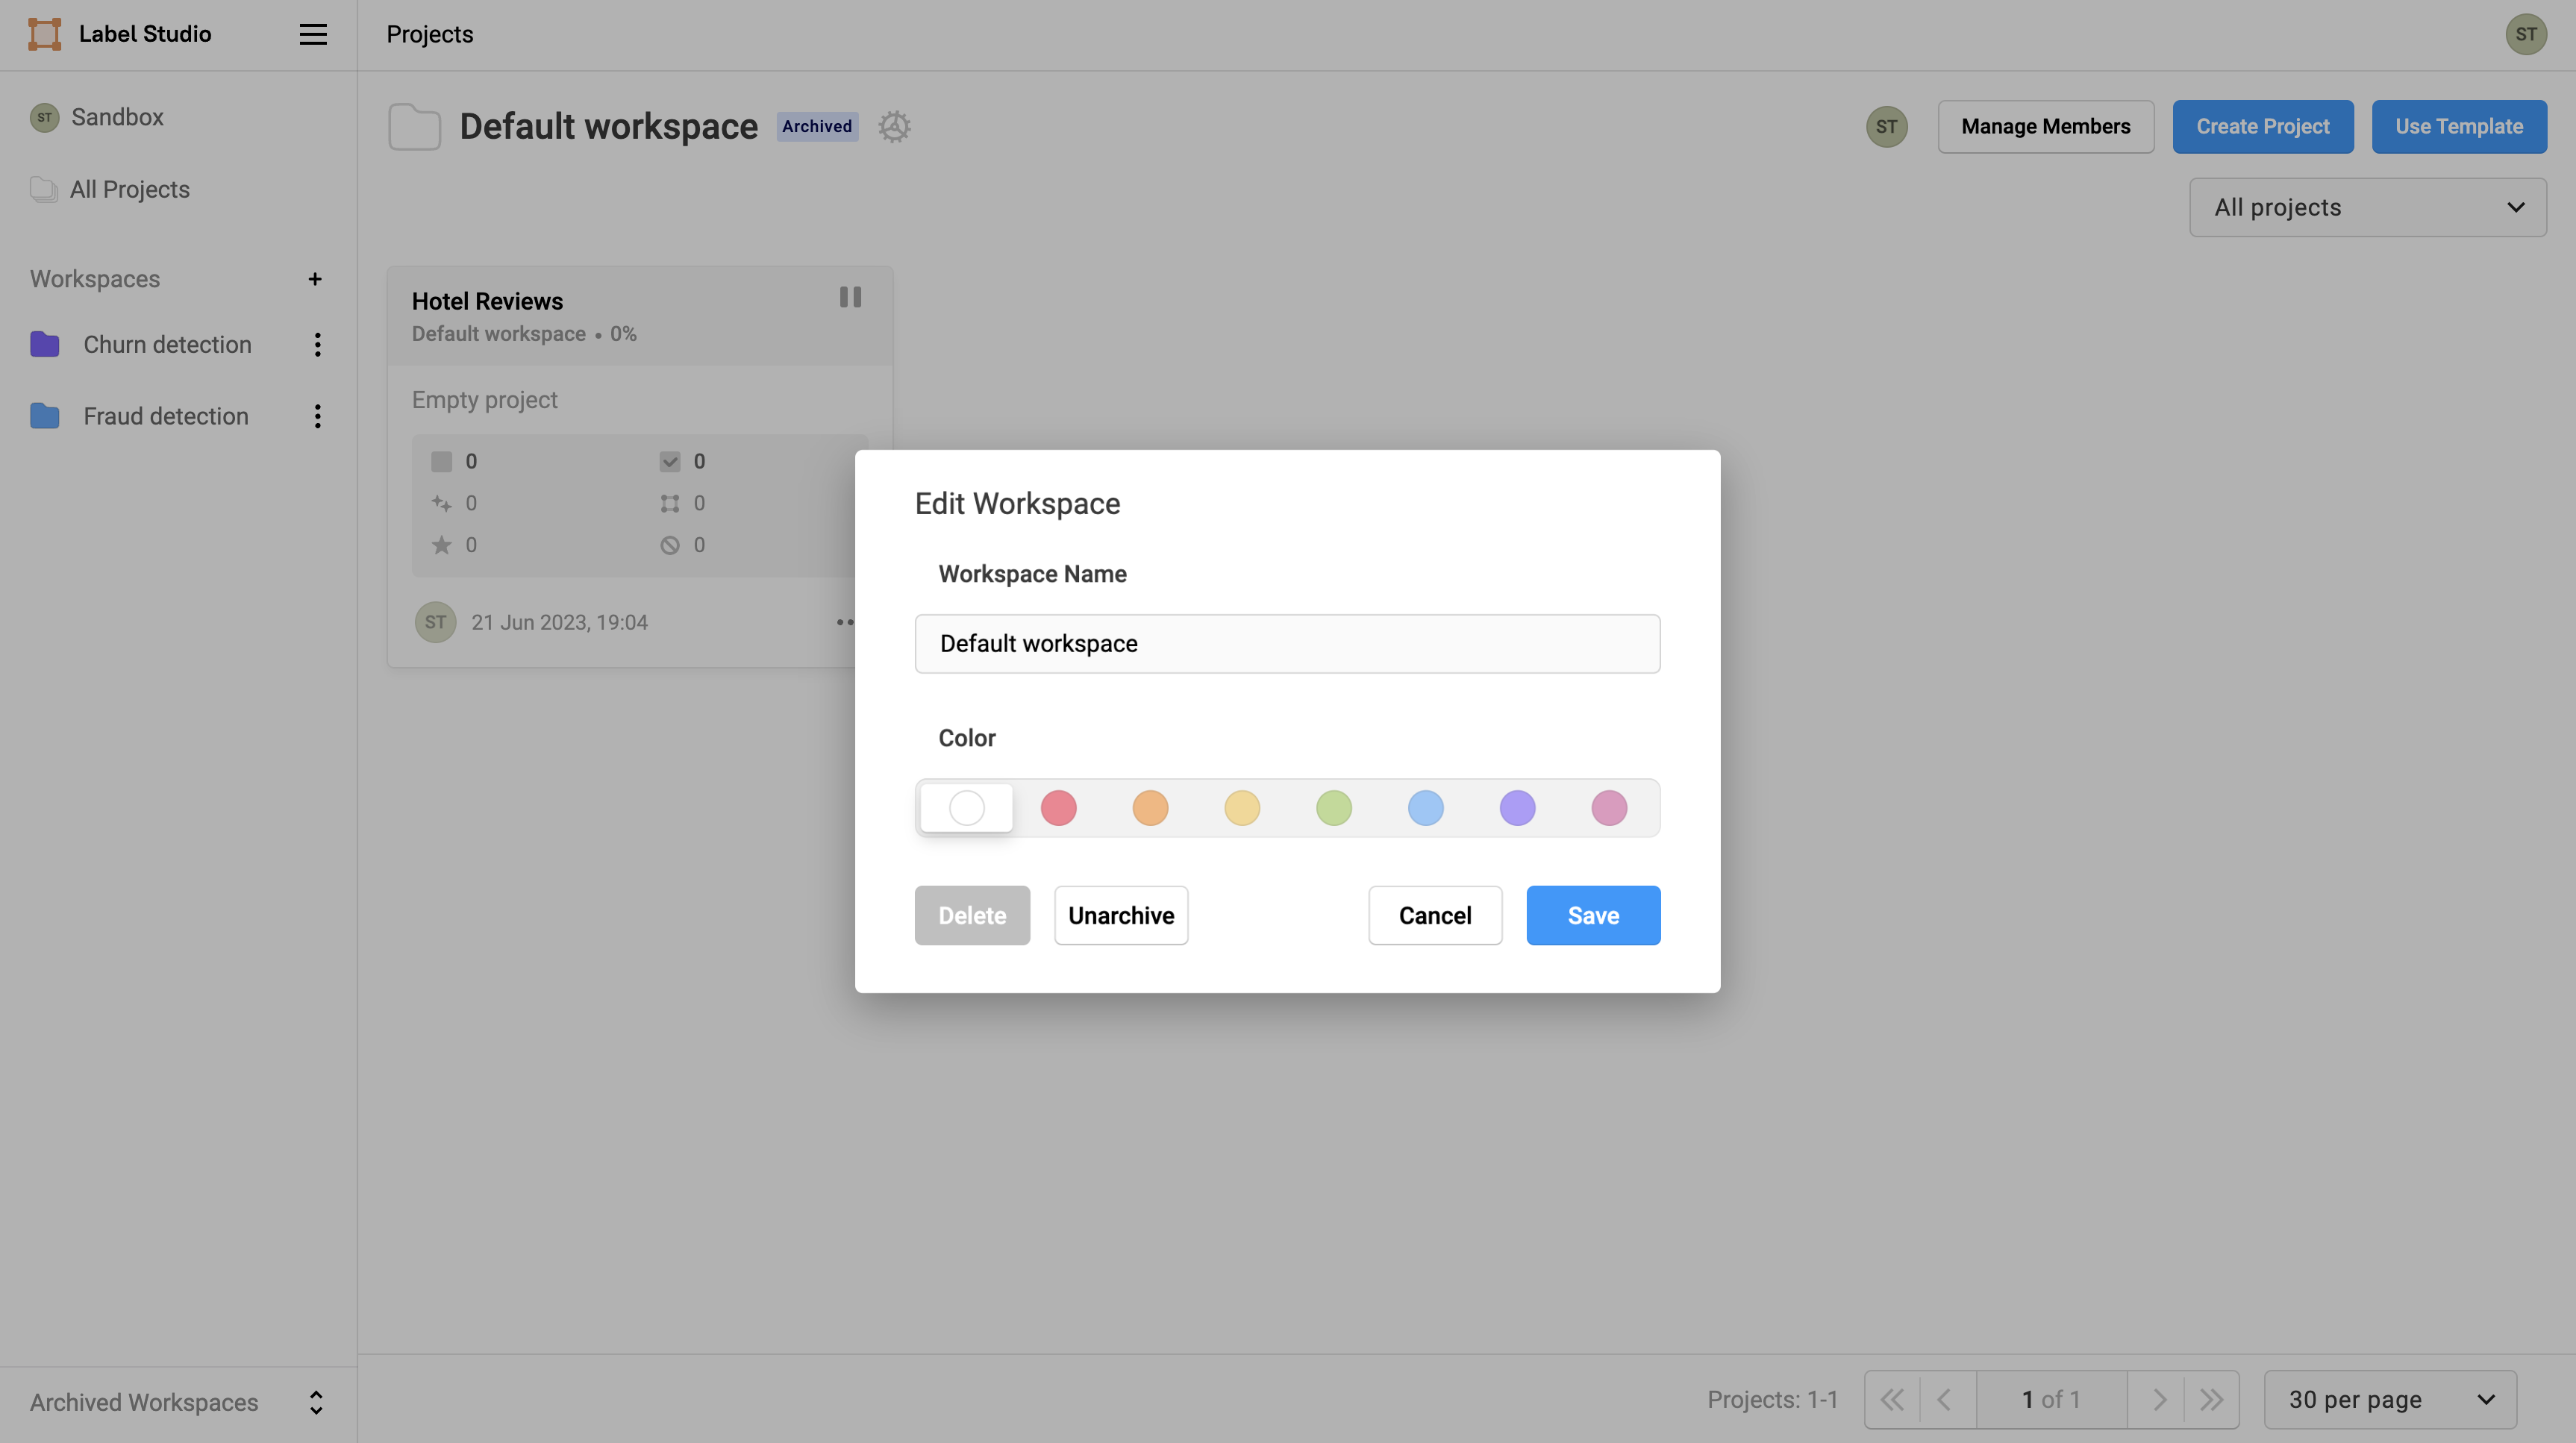
Delete a workspace
You can only delete a workspace if it has no projects. If you want to delete a workspace, first delete the projects or move them to another workspace.
To delete a workspace, do the following:
- In the Label Studio UI, open the workspace.
- Click the gear icon next to the workspace name.
- In the dialog box that appears, click Delete Workspace. If the button is not available to select, the workspace still contains projects.